Just in time for summer, I found a recipe for repelling ticks and fleas for pets and people.
Here in Maine, ticks are a big deal. Every year people get lyme disease from catching ticks while spending time in the great outdoors.
Thanks to my friend, Darcy, for putting a spray bottle of this recipe together for us. Here it is:
Kick The Tick Spray
You need:
1 part water
2 parts distilled white vinegar
an HDPE spray bottle
Ticks hate the smell and taste of vinegar. The basic recipe above is enough to repel ticks from pets and people, but you can add more optional ingredients as I will show you below:
For pets, you can add almond oil, which contains sulfur, a tick repellent.
For both pets and people, lemon juice, citrus oil, eucalyptus or peppermint oil also repels fleas while making the spray smell fresher.
Spray on shoes, clothes, skin and hair before going outdoors. It should be good for four hours. Spray again if spending more time outdoors.
Spray all over dry pet fur before going outdoors. Take care not to spray eyes, nose, mouth and genitals.
Enjoy the warm weather, but check for ticks as soon as you get back indoors. Keep a tick removal tool in the first aid kit just in case.
The family that zaps together stays healthy together.
And that includes our dear dog, Cosmo.
We all know how many parasites our pets can bring into the home. Taking care of the littlest ones in our family is the secret to keeping everyone healthy in the household.
One way to zap our furry family members is to hold the copper handles up against our pet’s skin, getting the fur out of the way. Cosmo has pits that have very little fur, so I put the copper handles there. For other pets, it may be their belly area. Just find spots that will make the most contact with the copper handles.
The second, more effective, way to zap pets is by setting up a Zappicator. A Zappicator is created by the combination of a Hulda Clark Zapper set to 1 kHz connected to a North Pole Speaker. I set up the North Pole Speaker Box under Cosmo’s bed and he can relax while zapping.
We made a movie! My husband, daughter and I have been making a short movie series since summer last year. My daughter calls it Time Brats. It’s a sci-fi fantasy musical, and she invites her cousins, classmates, and in this latest one, the 4th episode, her 2nd grade teacher, to be part of it. It’s a lot of fun, and keeps me and my husband busy making props and costumes before the shoot, and editing and soundtracking after it. Here’s the video. We had so much fun making it. I hope you like it.
But that’s not really what this blog post is about. I want to show you how to sew the Chipmunks’ Ears out of scrap fabric we had at home. It’s easy!
Materials:
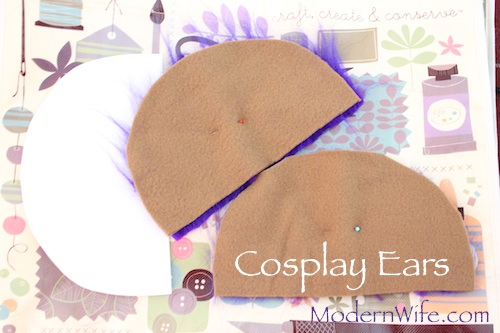
paper for making a pattern
brown fabric (we used fleece)
bright colored furry fabric (we had violet at home)
plastic headband close to the wearer’s hair color
sewing machine, thread, scissors, pins, thimble, whatever it takes for you to work on a sewing project
Start by cutting out a pattern. It’s really simple, just a straight line at the bottom and a half circle above. It can be as big or small as you want the ears to be. I imagine making it small would be a lot more difficult, unless you have really tiny fingers, so make it a decent size, maybe half an 8 1/2 by 11 piece of paper.
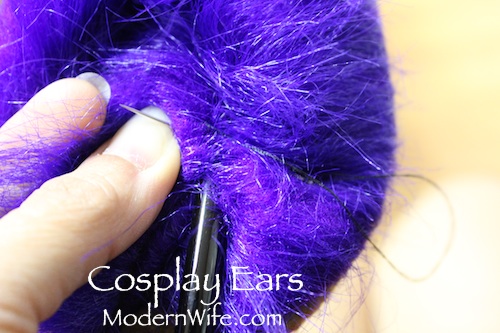
When it’s time to cut out the fabric, make sure your fur goes in the direction away from the straight line. I’m not sure I’m describing it accurately so just take a look at the picture above to see what I mean. Cut out 2 sets for 2 ears.
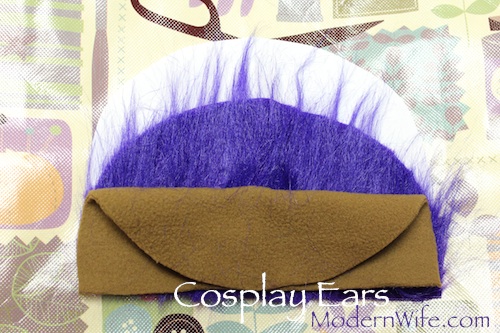
Put the fabrics together, right sides facing each other, wrong sides on the outside. Tuck the fur in so we don’t sew it and we get more fuzz for fun. Then sew the half-circle around. Don’t worry if you have to make little pleats just to make the two pieces of fabric fit. Just make sure you keep the ends of the straight line bottom together.
Turn it inside out. See the pleats I did when I sewed the half circle? It looks pretty cool.
Fold the straight sides in, and sew together.
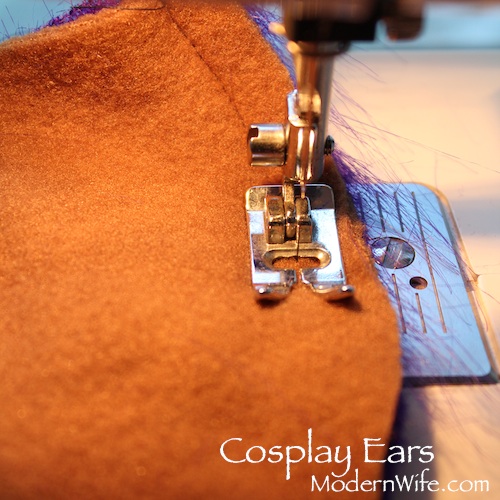
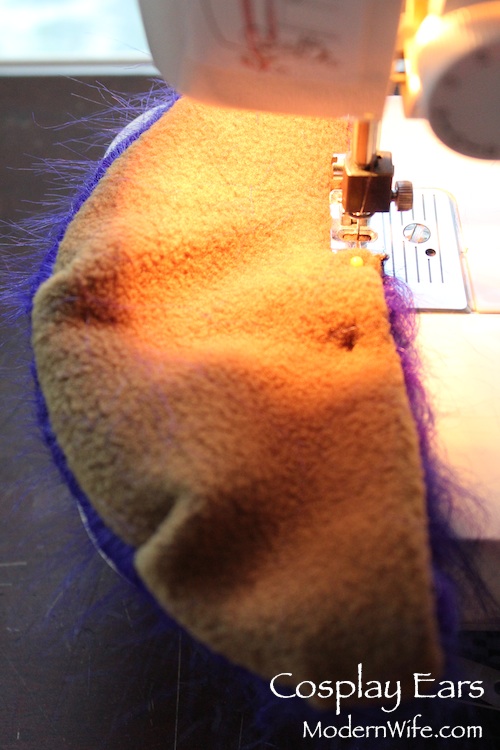
Now here’s the tricky part. To get those ears on the headband, you’ll need to hand-sew it on. Fold the ears in half, fur on the inside and set it up straight side in line with the headband, curved side sticking outward like, oh yeah, ears! Hand-sew the ears together to hold on to the headband. You could knock yourself out and sew the whole straight side together, but I just sewed the part close to the fold, and then the ends.
To really secure the ears to the headband, get into the furry part and sew it together close to the headband. I just did the middle of the ear and it stayed put well enough for two 8-year-olds to wear all day and shake their heads around in.
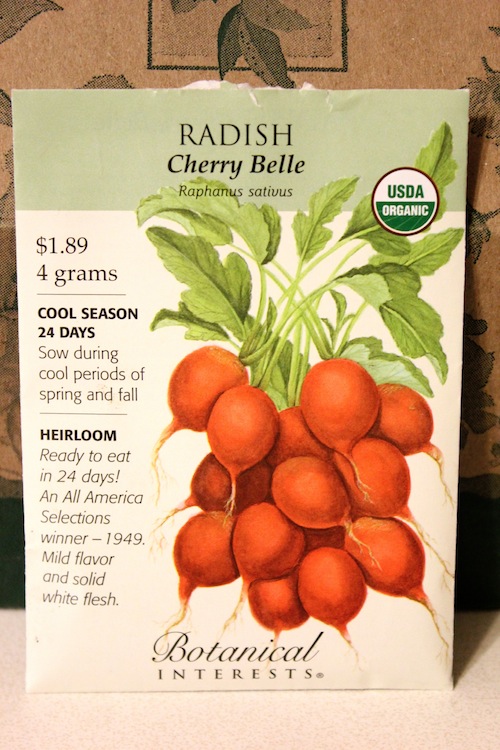
My Shade Garden is coming along nicely. Most of it, at least. I planted early spring plants such as peas, sugar snap peas, broccoli, lettuce, radishes and beets on February 16 and 17.
The radishes are perking up adorably as well. Here’s one. I love its red stems and heart-shaped leaves.
I can’t wait to see these underground beauties.
The lettuce, broccoli, spinach and beets have also sprouted, but I’ll wait a little bit until they’re bigger before I take pictures.
Someone has been messing around in my garden. I don’t know if it’s a bird or a little mammal, but I really need to figure out a way to keep my plants from getting eaten. I have both a cat and a dog, and the neighbors’ cats come over to play too. You’d think we’d keep the rodents and birds in check, but I still see a lot of gopher holes throughout the lawn.
I was thinking of maybe building some kind of Arduino-powered robot-scarecrow to create a motion-detecting alarm to scare off little creatures. Still tossing around some ideas. Maybe something as simple as solar-powered or wind-powered kinetic sculptures would be sufficient.
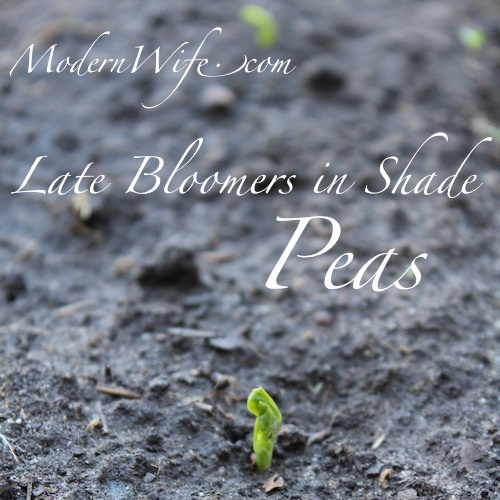
As for the Little Marvel Shelling Peas I had leftover from last year, I wrote about refrigerating them before putting them in the ground. I think I read about it somewhere in an old copy of The Old Farmers Almanac. Well, my peas took a very long time to emerge. The Sugar Snaps were way further along before I saw even just a peep of the peas. I finally saw some of them this weekend.
What else have I got to report? Remember the rose bushes I pruned and fed banana peels? They are growing so big and beautiful. Here’s Security, the Rose Bush with the killer thorns by my daughter’s window.