Tag: baking

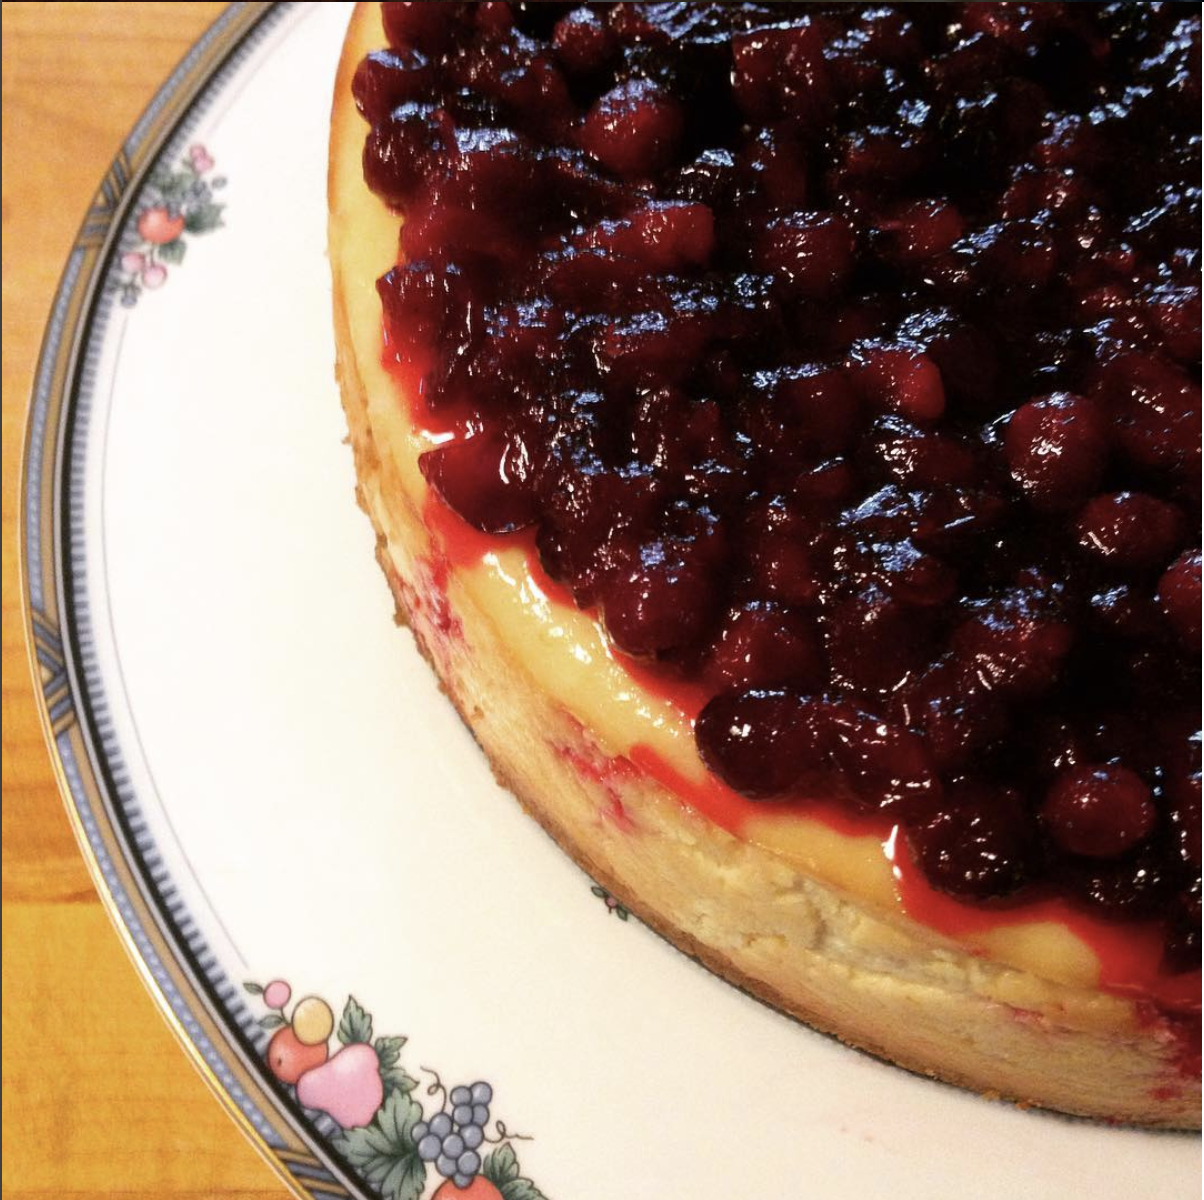
  • Cranberry Cheesecake

    Cranberry Cheesecake

    From the moment I took my first ever bite of a cheesecake, I was hooked for life. For the longest time, though, I always bought it, never made it from scratch here at home. It took a friend coming over and making one right in my kitchen before I realized how easy it is. Back then I didn’t even have a KitchenAid Mixer . It was all made with elbow grease. (The trick is to make sure the cream cheese is completely soft.)

    Now that my dear husband bought me one, it’s even easier. Faster. Well, at least the prep is. So tempt your family with this cheesecake recipe if you want them to get you a KitchenAid Mixer for Christmas. It will be worth it, I promise.

    Cranberry Cheesecake

    Ingredients for Cheesecake:
    (Get certified organic ingredients when possible.)
    15 graham crackers, ground
    3 tablespoons butter, melted
    4 packages cream cheese (8 oz each)
    1 1/2 cups sugar
    3/4 cup almond milk
    4 eggs
    1 cup sour cream
    1 tablespoon vanilla
    1/4 cup all-purpose flour

    Preheat the oven to 350 degrees Fahrenheit (175 degrees Celsius). Grease a 9 inch springform pan. Thrifty Tip: I save the wax paper from sticks of butter in the freezer. I use it to grease any and all baking pans.

    In a medium bowl, mix graham cracker crumbs with melted butter and press onto the bottom of the springform pan.

    In the KitchenAid Mixer bowl (or a large bowl), mix cream cheese with sugar until smooth. Add almond milk, eggs one at a time, sour cream, vanilla, and flour. Mix until smooth. Pour this cream cheese mix into springform pan, on top of the graham cracker crust.

    Bake for 1 hour. Turn the oven down to 300 degrees Fahrenheit for the next 30 minutes, then to 250 for another 30 minutes. Turn the oven off but let the cheesecake stand in the oven. Do not take the cheesecake out. Keep the oven door closed while it cools, approximately 5 hours. Once the oven and the cheesecake is cooled completely, take the cheesecake out of the oven and chill in the refrigerator.

    For cranberry topping, use my Maple Cranberry Sauce recipe.

    Cheers to you on this holiday season!
  • How to make a Thanksgiving Dinner that will make Hulda Clark proud (and kitchen tips for health)

    How to make a Thanksgiving Dinner that will make Hulda Clark proud (and kitchen tips for health)

    I love Thanksgiving Dinner at home. My family loves to cook! Spending the day together in the kitchen is our kind of holiday.

    While writing down my Thanksgiving Dinner menu the other night, my mind wandered toward a list of what I am thankful for. On top of that list is my family’s health, which led me to think about Hulda Clark.

    Twenty years ago, my father-in-law sent my husband and me a book that changed our lives. It was “The Cure For All Cancers,” by Hulda Clark. Hulda Clark’s book opened my eyes to a whole new paradigm in health. She gave me hope by showing me a better way to live. I have a healthy family because of the lifestyle lessons I learned from her. For that I will forever be thankful.

    bamboo forks and knives

    It makes me wonder what it would be like if we had Hulda Clark over for Thanksgiving Dinner. Would I pass the Hulda Clark test? She’s very strict. Here are a few ideas on how to make a Thanksgiving Dinner that Hulda Clark would be proud of:

    1. Get a certified organic turkey.

    And not only turkey, but as many certified organic ingredients as possible for making Thanksgiving Dinner. Don’t let too many toxic chemicals, antibiotics, and GMOs crash your party.

    2. Use glass or stainless steel cookware.

    Hulda Clark recommended as little contact with metal as possible. For cookware, high quality stainless steel is the exception because it is the least likely to leach into its contents. How do you know if it’s high quality? Put a magnet to it. If the magnet sticks, you’re good to go.

    Instead of a copper or aluminum roasting pan and bakeware, use glass pyrex or stainless steel. Tie up your bird with twine, but don’t use the metal pins. Use stainless steel pots and pans. Use wooden spoons and spatulas for stirring. Use ceramic knives for chopping up vegetables. They’re extremely sharp and require no re-sharpening. Use a stainless steel knife for carving the turkey.

    3. Make everything from scratch.

    Let me share my recipes with you:

    There are millions of other recipes online. Choose the ones that have the least processed ingredients.

    4. Use bamboo forks and knives for place settings.

    As I explained in #2, Hulda Clark recommended as little contact with metal as possible. She lauded Asian cultures that use chopsticks for eating as a model of health.

    Think back to the fall of the Roman Empire due to its misuse of lead in irrigation pipes and goblets. This is the sound alarm that Hulda Clark points to in our civilization’s use of metal amalgams in many things such as cookware, tableware, tooth fillings, and so on.

    Switching to bamboo cutlery makes a giant dent in curbing our daily exposure to metal.

    5. Zappicate food before serving.

    Find pockets of time to zappicate food before serving. Turkey is supposed to rest for 30 minutes after being taken out of the oven. Let that rest time count by setting it on top of the Food Zappicator. (Make sure it’s on its serving platter and not the hot roasting pan to prevent from heat-damaging your North Pole Speaker Box.)

    Do the same for side dishes. Just a little bit of time on the Food Zappicator for some last minute zapping makes the food ready for a healthy meal.

    Do you think Hulda Clark would be proud of my Thanksgiving Dinner? Can you think of any other details I missed?

  • Autumn Apple Pie

    Autumn Apple Pie

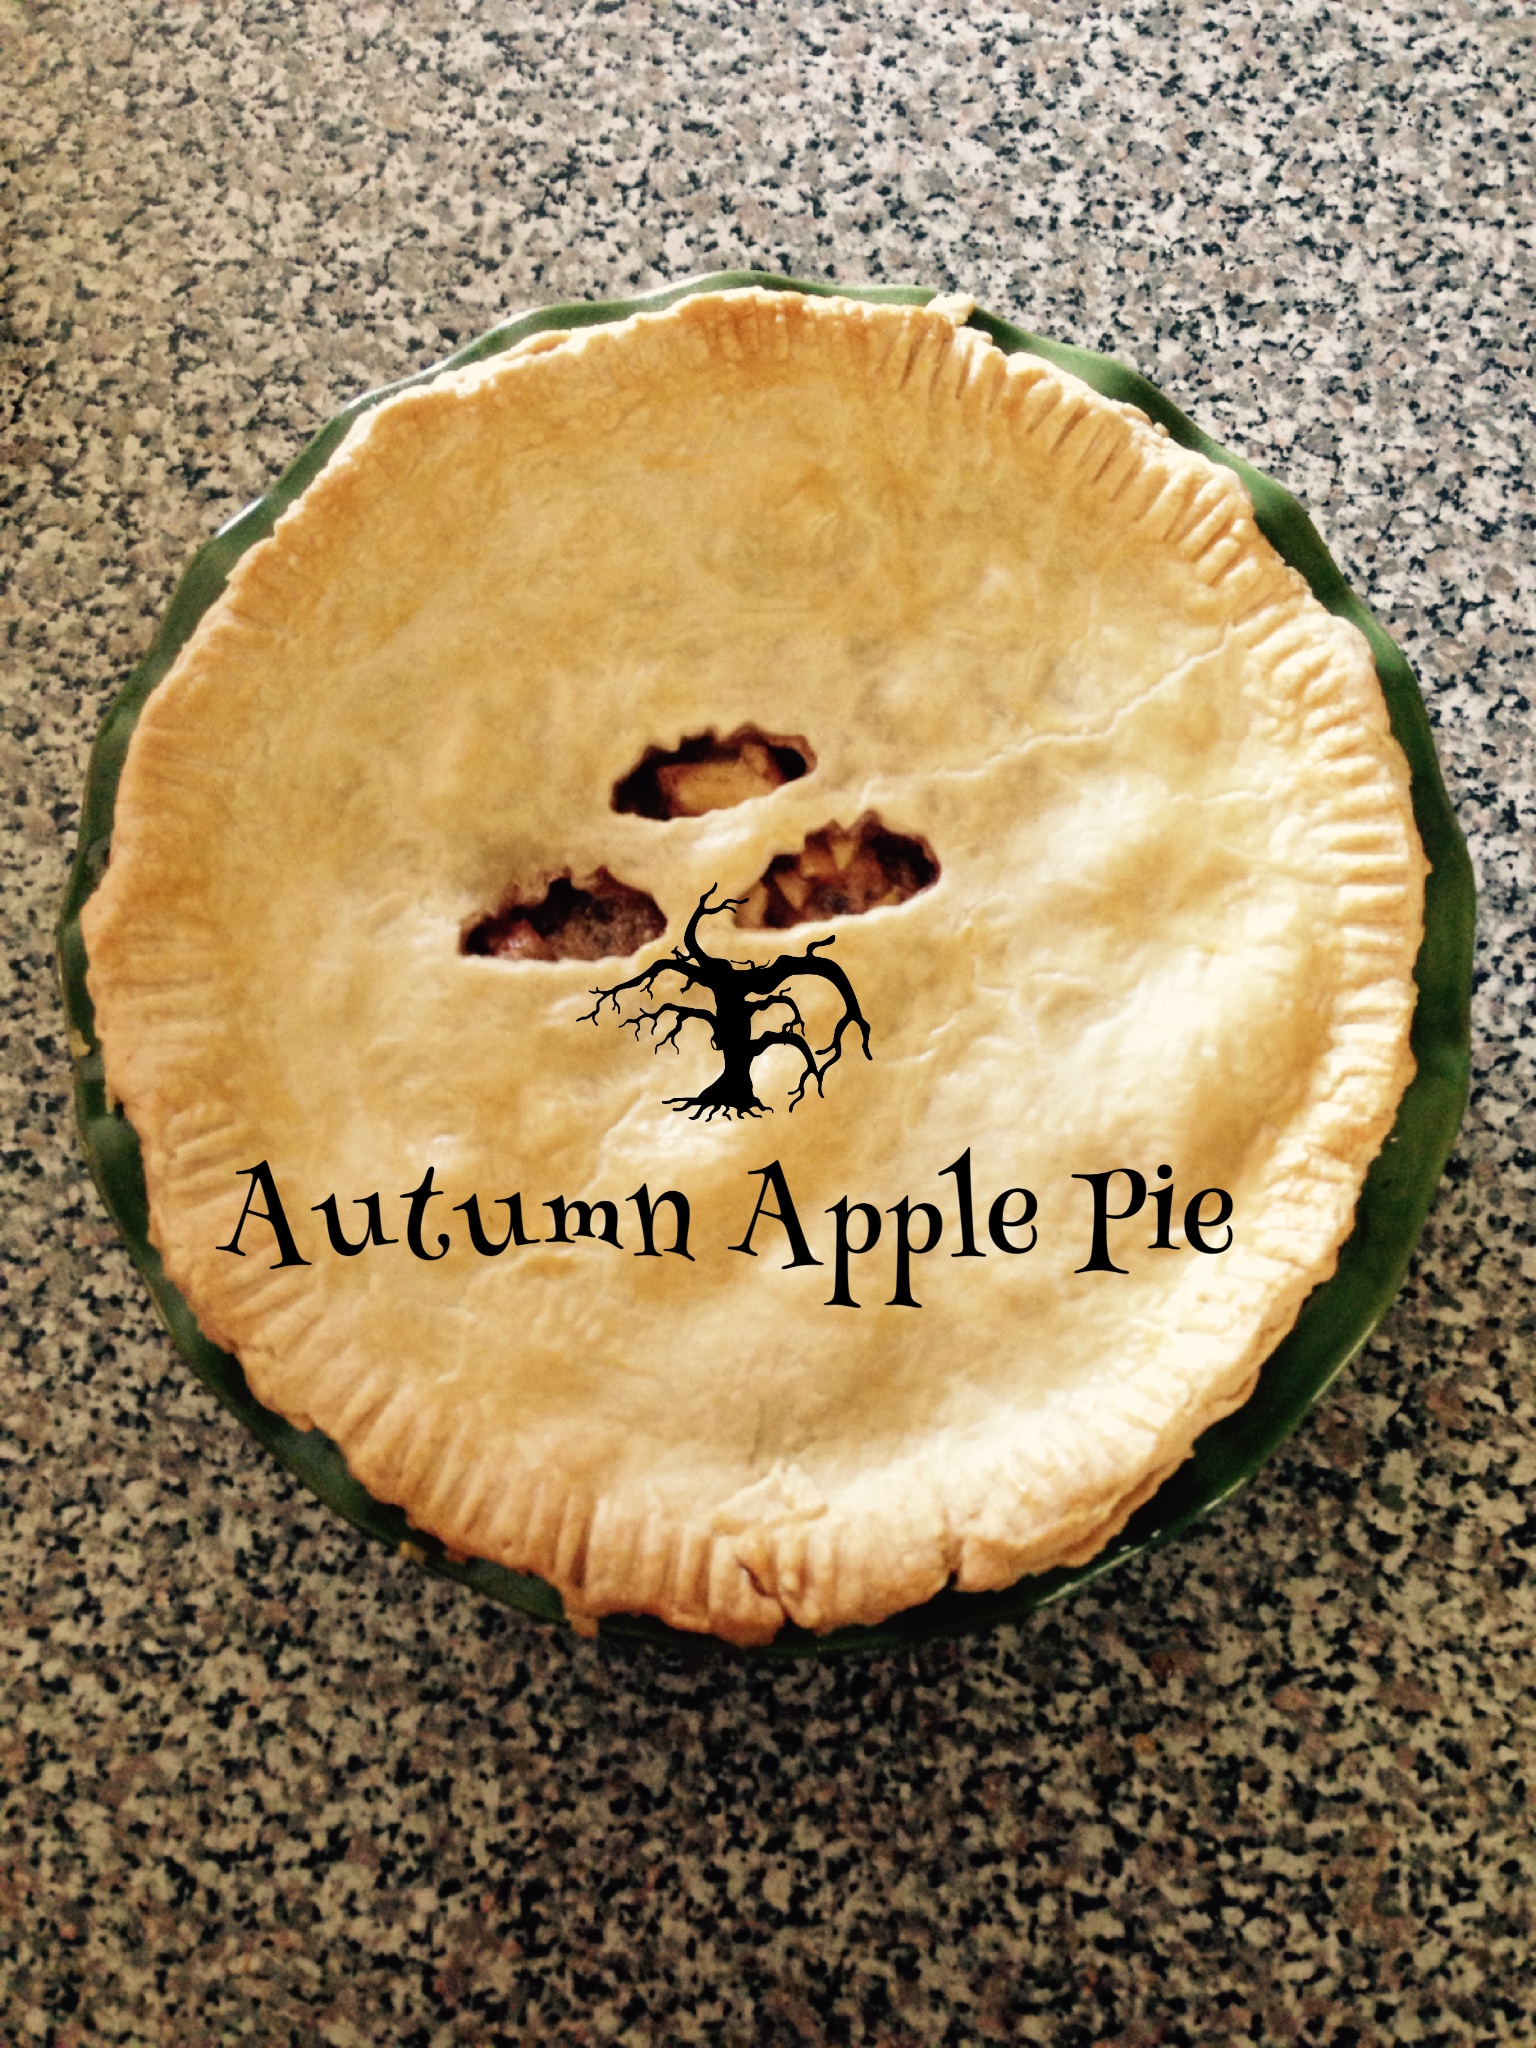
    This is a basic apple pie recipe that your grandmother likely already has in her recipe box, but here you go. Now you can have this apple pie recipe online as well.

    Apple Pie

    Ingredients: Perfect Pie Crust
    3 cups pastry flour
    1 cup (2 sticks) butter, softened
    pinch of salt
    1/2 cup iced water

    This is my perfect pie crust. I learned how to do it from a vintage recipe when I got married in 1996 and have perfected it all these years. Mix flour, butter and salt, until mixture is in crumbs. Toss with iced water. Do not overmix. Divide pie crust dough into two. Use the wax paper from one of the sticks of butter to grease the pie pan. Roll out one part of the dough and lay in the pie pan. Roll out the second part of the dough and cut out holes to let the steam out.

    Ingredients: Apple Pie Filling
    7 organic apples, peeled and sliced thin
    1/2 cup organic cane sugar
    1/2 cup organic brown sugar
    3 tablespoons organic and unbleached all-purpose flour
    1 teaspoons organic ground cinnamon
    1/4 teaspoon organic ground ginger
    1/4 teaspoon organic ground nutmeg

    Preheat oven at 375 degrees Fahrenheit. Mix all apple pie filling ingredients in a large bowl. Pour into the pie crust bottom already in the pie pan. Cover with the top pie crust. Pinch together and push a non-metal fork’s tines on the edge of the crust. This is a good time to put the assembled apple pie on the Food Zappicator and turn the zapper on to zappicate the pie. Brush whisked organic egg white on the top crust while zappicating. The egg white wash will give the pie a nice golden color once baked in the oven. Bake for 25 minutes. Turn the pie in the oven and bake for another 25 minutes. Cool before serving.

  • Pigs in a blanket

    Pigs in a blanket

    This little piggy went to the party. This little piggy went to school. This little piggy was an afternoon snack at home. This little piggy went to gymnastics practice. And this little piggy went wee wee wee all the way in my tummy.

    It’s the middle of winter and these piggies are cold! Make them blankets from scratch! Sure, you can buy prepackaged dough that pops out of a cardboard can, but then you’d be setting yourself up for all kinds of chemical additives and subpar ingredients. Besides, making the dough from scratch is easy and fun. My 11 year-old daughter can do it by herself. Kneading it is the best part. She gets all kung fu about it. You can, too.

    Pigs in a blanket recipe

    Ingredients:
    2 cups organic all-purpose flour
    1/2 teaspoon baking powder
    1 tablespoon sugar
    1 teaspoon salt
    1/2 cup organic safflower oil
    1/2 cup hot water
    30 mini beef franks
    1 egg, beaten
    sesame seeds
    flax seeds

    Preheat oven 375 degrees F. Mix together flour, baking powder, sugar and salt in a medium bowl. Add oil and water. Whisk together until fully incorporated and you see no powdered lumps left. Knead the dough well on a floured surface. Divide the dough in half and roll out the first lump until it’s thin and semi-rectangular. Using a knife or a pizza roller, cut out 15 triangles. Position a mini frank on the wider end of each triangle and roll the dough around the little piggy. Brush with egg and lay on a greased baking sheet. Repeat until there are 30 little piggies in a row. Sprinkle sesame seeds and flax seeds. Bake for 25 minutes or until pastry is golden brown.

  • Coconut Muffins

    Coconut Muffins

    Coconuts made quite an impression on my husband and daughter when we visited the Philippines. My home has coconut trees growing right on our front yard. One Sunday morning a boy climbed one of the trees with a machete and carefully lowered bunches of coconuts down to our driveway.

    harvesting coconuts from tree in the Philippines

    We drank fresh coconut juice and ate fresh coconut “meat” that day.

    Coconuts are nutritious and can be eaten in so many different ways: juice, “meat,” oil, milk. Here’s a healthy breakfast recipe that uses various coconut products:

    Coconut Muffins

    Ingredients:
    4 tablespoons organic virgin coconut oil, melted into liquid
    6 organic eggs
    1/2 cup organic coconut milk
    1/2 teaspoon salt
    1/2 cup organic coconut flour
    1/2 teaspoon aluminum-free baking powder
    6 tablespoons shredded unsweetened coconut

    Preheat oven to 400˚F. Grease a 12-muffin pan with coconut oil or use paper muffin cups.

    Beat eggs, coconut oil, coconut milk and salt. Add coconut flour and baking powder. Whisk until smooth. Pour batter halfway into muffin cups. Sprinkle with shredded coconut.

    Bake for 15 to 20 minutes. Makes 12 muffins. Serve with raw honey for sweetening.

    This is based on a recipe found in The Candida Free Cookbook by Shasta Press. I skipped the Stevia for sweetening. Stevia is the sweetener of choice for people who are on a candida-free diet. Since my family and I are not, I took the liberty of topping the unsweetened coconut muffins with raw honey to taste.

  • Cranberry Mini Tarts

    Cranberry Mini Tarts

    After many years of cooking a whole Thanksgiving dinner and getting my pace and timing down just right, I am taking a break. Tonight will be the first Thanksgiving dinner I will not be cooking. We are going to spend Thanksgiving with my husband’s side of the family, and Aunt Faye will be making us a fantastic old-fashioned Thanksgiving meal.

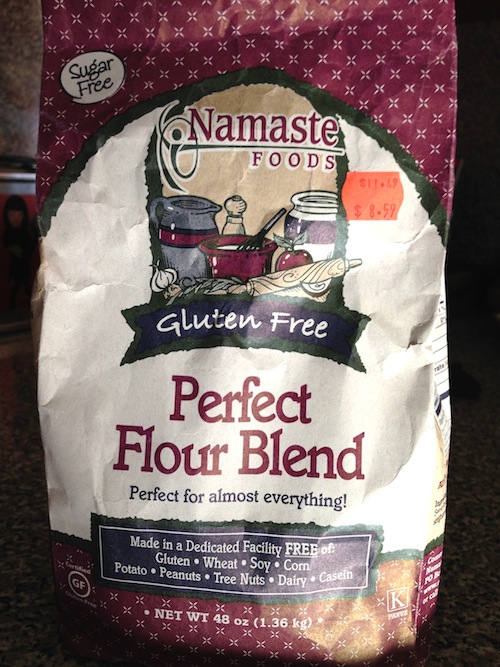
    Of course, I’m not coming empty-handed. I made these Cranberry Tarts at my daughter’s birthday party recently and they were a hit with everyone. The recipe is gluten-free and nut-free, very important since we have people with gluten and nut sensitivities in the family. I use Namaste Foods Gluten Free Flour Blend.

    Namaste Foods Gluten-Free Flour Blend

    My daughter helped me make these, and it was all we could do to keep ourselves from eating them all up before it’s time to go to Thanksgiving dinner.

    Before beginning, make sure you have the following kitchen tools:
    2 mixing bowls, small or medium
    measuring cups and measuring spoons
    whisk
    wooden spoon
    mini muffin pan
    colander
    oven

    Here we go…

    Cranberry Mini Tarts

    Ingredients for Crust:
    1 1/2 cups Gluten-Free Flour Blend
    3/4 cups organic butter
    6 oz. organic cream cheese

    Ingredients for Filling:
    1/2 cup organic sugar
    1 organic egg
    1/4 cup organic butter
    1 teaspoon organic vanilla extract
    8 oz. fresh cranberries

    Preheat the oven to 325 degrees Fahrenheit. Grease the mini muffin pan with butter wrapper.

    Beat together gluten-free flour, butter and cream cheese until it forms a ball of dough. I don’t have an electric mixer, so I just use a wooden spoon to combine the ingredients, then knead it by hand until it’s a nice smooth consistency.

    Pinch small portions, roll them up in balls, flatten and press evenly into the bottom and sides of mini muffin cups.

    Now we’re ready for the filling. Whisk together sugar, egg, butter and vanilla.

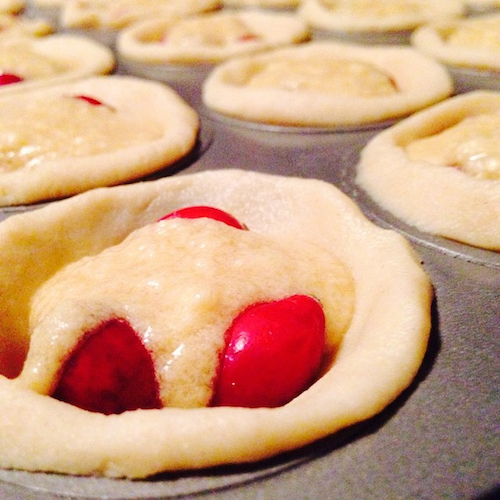
    Wash the fresh cranberries in a colander. Put about 5 cranberries in each mini muffin cup crust. This was like playing mancala.

    Pour a small spoonful of filling over the cranberries in each mini muffin cup crust.

    Cranberry Mini Tarts Before Baking

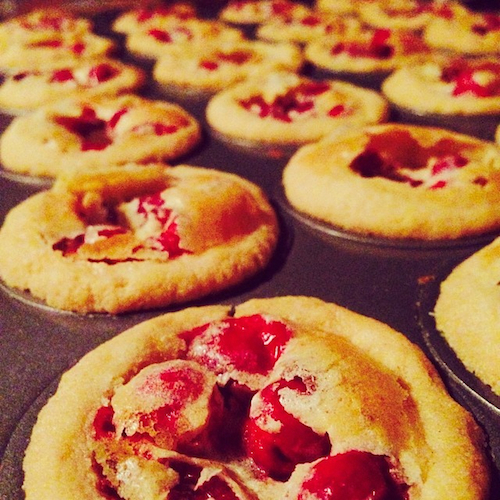
    Bake for 25 minutes, or until the tarts are golden. Let it cool completely then remove from pan.

    Cranberry Mini Tarts

    Share these treats with your family and friends!

  • Carrot Cupcakes

    Carrot Cupcakes

    When my daughter was two we spent the year in Maine. Her Grammy grew a garden and took the wee one out to pick carrots throughout the summer. Grammy has now been dead for two years, but my daughter, now 8, still thinks fondly of her and those freshly picked carrots. So in honor of the coming of spring and of Grammy’s recent birthday, we made Carrot Cupcakes. Happy birthday, Grammy!

    Ingredients:
    2 cups all-purpose flour, unbleached
    2 cups organic sugar
    3 cups shredded organic carrots
    1 teaspoon baking powder
    1 teaspoon baking soda, aluminum-free
    1 teaspoon cinnamon
    1 cup organic canola oil
    4 large eggs, free-range and organic

    Preheat oven to 350 degrees Fahrenheit. Prepare cupcake pan with cupcake liners. Mix all the ingredients together in a large bowl until smooth. Pour into cupcake pan cups only about halfway to 3/4 of the way. Bake for 20 to 25 minutes. Test with a fork and when it comes out clean, the cupcakes are done. Cool completely before frosting.

    Frosting:
    10 oz organic cream cheese
    10 tablespoons organic butter, softened
    3 1/3 teaspoon orange extract
    5 cups organic powdered sugar

    Beat the cream cheese and butter together until creamy. Stir in orange extract and powdered sugar gradually.

  • Quinoa Asparagus, Oregano Chicken

    Quinoa Asparagus, Oregano Chicken

    Doesn’t that sound like a martial arts movie with English subtitles? Maybe not.

    How about this one? Vegetarian cook for meat-loving… what rhymes with cook?

    I have a new challenge in the kitchen. I don’t want to eat meat anymore. Why be a vegetarian? I came up with these answers when I was 16, the first time I quit meat.

    1. Meat tastes sweaty. It’s flesh. If we were meant to eat meat, we would enjoy the taste of it raw the way carnivorous animals do. We do so much to make meat palatable – marinades, sauces, spices, rubs – but on its own, meat is gross.
    2. Industrial meat farms are evil. Overcrowded, dirty, drugged and abused animals is where meat comes from. I don’t want to support that evil with my money.
    3. We are what we eat. We eat our food’s life force, its fear, its sadness or its happiness. I have nothing against killing animals for food, just like I have nothing against carnivorous animals. What I care about is that animals lived a full life according to their nature before they are killed for food. Animals I described in #2 above are not the kind of energy I want in me.

    You’re probably thinking, so what? Lots of people are vegetarians and there are a lot of vegetarian recipes online, that’s really not much of a challenge. Well, my husband and my daughter love meat. In fact, the reason I started eating meat again was my baby.

    There we were, Jay and me eating at a sunny diner, when suddenly there was this foreign urge in me to reach a fork out to his plate. “Can I have that sausage patty?” I asked.

    He looked at me funny. I felt funny. It was as if my baby’s little fingers came through my vegetarian belly to grab a bite of that sausage patty. Weird. But I went with it. I ate meat throughout my pregnancy.

    Now it’s 8 years later and I’m quitting meat again, only this time I have to feed two meat-loving freaks in my family too.

    Since I first quit meat, there have been some changes in the meat industry. There are meat farms that raise their animals ethically. I scour grocery labels for the words, “free-range,” “grass-fed,” “free-roaming,” “organic.” It’s important to me that the meat I bring home came from animals who lived happy lives, and that I am supporting farms run by good people.

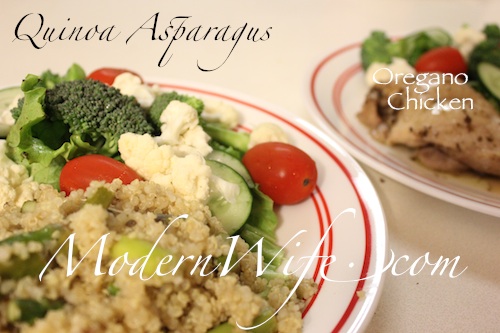
    So here’s what I did for dinner last night. I started out baking Oregano Chicken for the meat freaks. Then I made Quinoa Asparagus for me, and as a side for the chicken. This is like a double protein meal for the meat freaks, because quinoa is rich in protein. Raw salad rounds off the meal.

    Baked Oregano Chicken

    Ingredients:
    1/4 cup organic butter
    Juice of 1/2 a lemon
    2 tablespoons Bragg’s Liquid Aminos
    2 teaspoons dried organic oregano
    1 lb of organic chicken

    Preheat the oven 375F (or 190C).

    Lay those chicken pieces in a baking pan. I used a square glass pyrex pan about 9×9, just enough room to keep the sauce together.

    Melt the butter in a small stainless steel saucepan. Add lemon, Bragg’s Liquid Aminos and oregano. Stir it up, then pour on top of the chicken. Bake for 30 to 45 minutes, until the chicken is cooked through.

    Quinoa Asparagus

    Ingredients:
    4 cups of water
    2 cups quinoa
    2 tablespoons extra virgin organic coconut oil
    1 green onion
    1 bunch organic asparagus
    1 teaspoon oregano
    Juice of 1/2 lemon

    Bring water to a boil, then add quinoa. Cook until the quinoa has absorbed the water.

    While waiting, heat 1 tablespoon coconut oil in a large skillet until it melts in the pan. Add green onions, asparagus, oregano. Sprinkle about a teaspoon of water to steam the asparagus. Cook until asparagus is tender but not mushy. Mix in the quinoa. Squeeze half a lemon, and stir in the remaining 1 tablespoon of coconut oil.

    What’s in my salad? Lettuce, broccoli, cauliflower, cucumber, grape tomatoes. These vegetables taste so good, I don’t dress them at all. That’s right, naked organic vegetables. So good.

  • Oatmeal Raisin Cookies

    Oatmeal Raisin Cookies

    Oatmeal Raisin Cookies have to be one of the easiest cookies to make. Everybody knows how to make that! That’s what I thought until I baked some.

    I got the recipe off the top of the Quaker Oats container. They call it the Vanishing Oatmeal Raisin Cookies. Here’s my version:

    Ingredients:
    1 cup (2 sticks) organic butter, softened
    1 cup organic brown sugar
    1/2 cup organic sugar
    2 eggs, organic
    1 teaspoon organic vanilla
    1 1/2 cups organic all-purpose flour
    1 teaspoon baking soda
    1 teaspoon organic cinnamon powder
    1/2 teaspoon salt
    3 cups old-fashioned rolled oats
    1 cup organic raisins

    Preheat the oven to 350 degrees Fahrenheit.

    Cream together the butter and sugars. Whisk in eggs and vanilla. Put the whisk away. Add flour, baking soda, cinnamon and salt. Using a spatula, mix the dry ingredients into the batter. Add oats and raisins. It will get very thick. Mix really well.

    Butter a baking sheet with wax paper covers, then spoon rounds of cookie dough about a couple of inches apart from each other.

    Now here was the tricky part for me. I baked the cookies too long and wound up with hard cookies. Bake it for 12 minutes. That’s it. (It might be even shorter if you live in a high altitude location.)

    Get the babies out of the oven and let them cool off on wire racks.

    Everybody loves these Oatmeal Raisin Cookies. Those people at Quaker Oats were right. These cookies quickly vanish. I have to make more!

  • Mini Cinnamon Rolls

    Mini Cinnamon Rolls

    Whenever I make pies I wind up with extra dough from the pie crust. I hate throwing anything away, especially my pie crust. It’s so good! So I’ll tell you what I do.

    Preheat oven to 350 degrees Fahrenheit.

    Mix up organic sugar and organic cinnamon. I’d say about 1 teaspoon cinnamon to about 1/4 cup of sugar. Mix it up good. Flatten that leftover pie crust dough with a rolling pin and sprinkle the cinnamon sugar all over it. Roll up the pie crust, jelly-roll-style, then slice it up thin. Arrange the cinnamon rolls on a baking sheet and bake for 10 to 15 minutes or until golden brown.

    Fun little treats!