Tag: thanksgiving

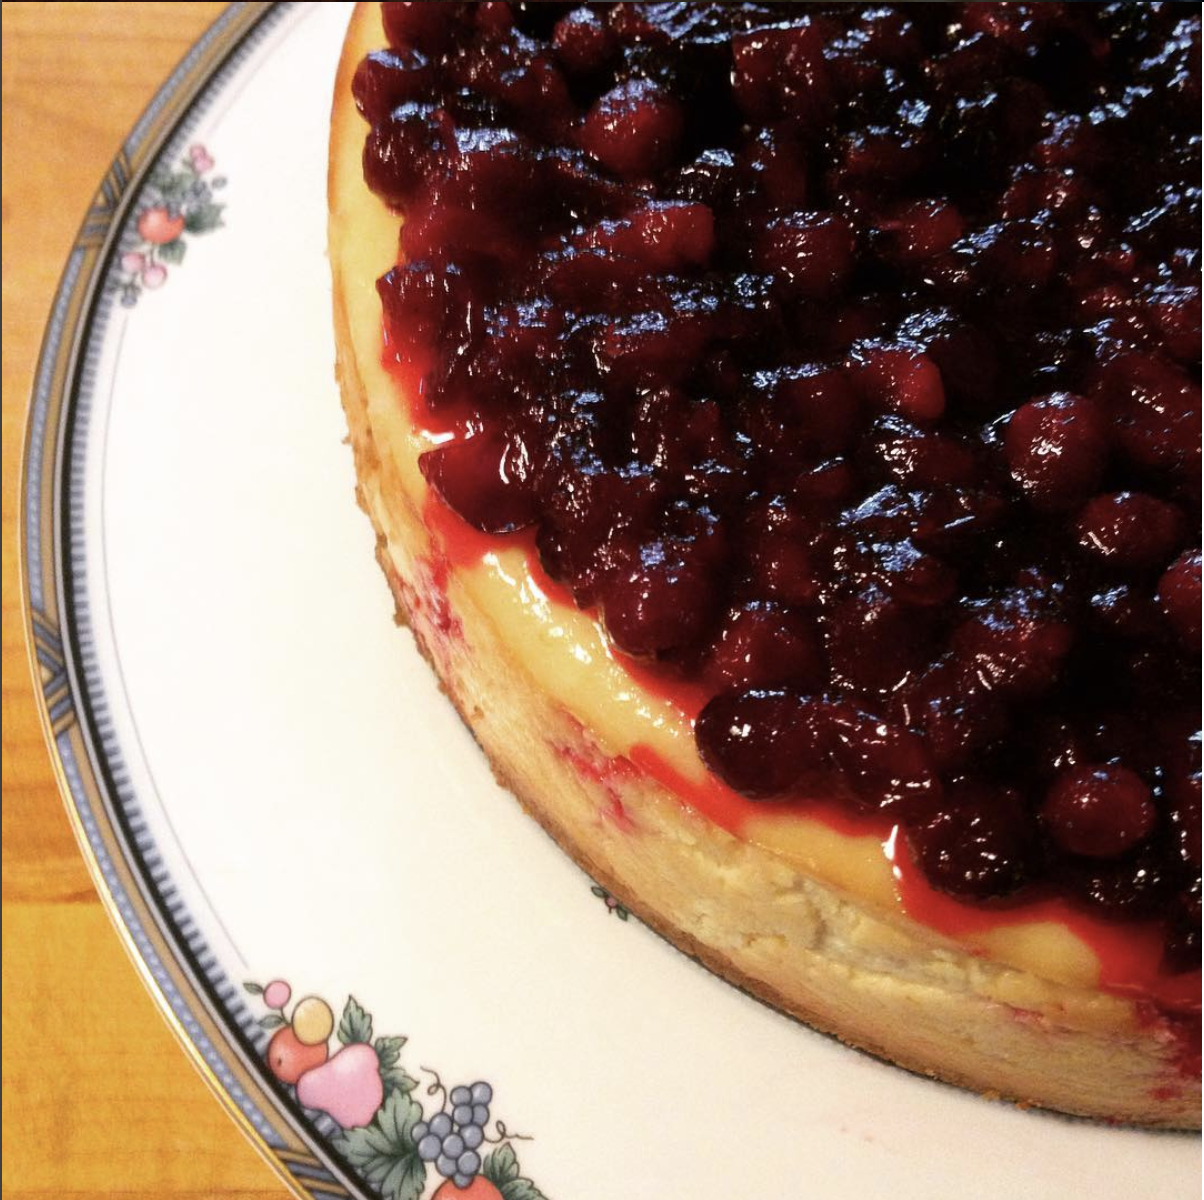
  • Cranberry Cheesecake

    Cranberry Cheesecake

    From the moment I took my first ever bite of a cheesecake, I was hooked for life. For the longest time, though, I always bought it, never made it from scratch here at home. It took a friend coming over and making one right in my kitchen before I realized how easy it is. Back then I didn’t even have a KitchenAid Mixer . It was all made with elbow grease. (The trick is to make sure the cream cheese is completely soft.)

    Now that my dear husband bought me one, it’s even easier. Faster. Well, at least the prep is. So tempt your family with this cheesecake recipe if you want them to get you a KitchenAid Mixer for Christmas. It will be worth it, I promise.

    Cranberry Cheesecake

    Ingredients for Cheesecake:
    (Get certified organic ingredients when possible.)
    15 graham crackers, ground
    3 tablespoons butter, melted
    4 packages cream cheese (8 oz each)
    1 1/2 cups sugar
    3/4 cup almond milk
    4 eggs
    1 cup sour cream
    1 tablespoon vanilla
    1/4 cup all-purpose flour

    Preheat the oven to 350 degrees Fahrenheit (175 degrees Celsius). Grease a 9 inch springform pan. Thrifty Tip: I save the wax paper from sticks of butter in the freezer. I use it to grease any and all baking pans.

    In a medium bowl, mix graham cracker crumbs with melted butter and press onto the bottom of the springform pan.

    In the KitchenAid Mixer bowl (or a large bowl), mix cream cheese with sugar until smooth. Add almond milk, eggs one at a time, sour cream, vanilla, and flour. Mix until smooth. Pour this cream cheese mix into springform pan, on top of the graham cracker crust.

    Bake for 1 hour. Turn the oven down to 300 degrees Fahrenheit for the next 30 minutes, then to 250 for another 30 minutes. Turn the oven off but let the cheesecake stand in the oven. Do not take the cheesecake out. Keep the oven door closed while it cools, approximately 5 hours. Once the oven and the cheesecake is cooled completely, take the cheesecake out of the oven and chill in the refrigerator.

    For cranberry topping, use my Maple Cranberry Sauce recipe.

    Cheers to you on this holiday season!
  • How to make a Thanksgiving Dinner that will make Hulda Clark proud (and kitchen tips for health)

    How to make a Thanksgiving Dinner that will make Hulda Clark proud (and kitchen tips for health)

    I love Thanksgiving Dinner at home. My family loves to cook! Spending the day together in the kitchen is our kind of holiday.

    While writing down my Thanksgiving Dinner menu the other night, my mind wandered toward a list of what I am thankful for. On top of that list is my family’s health, which led me to think about Hulda Clark.

    Twenty years ago, my father-in-law sent my husband and me a book that changed our lives. It was “The Cure For All Cancers,” by Hulda Clark. Hulda Clark’s book opened my eyes to a whole new paradigm in health. She gave me hope by showing me a better way to live. I have a healthy family because of the lifestyle lessons I learned from her. For that I will forever be thankful.

    bamboo forks and knives

    It makes me wonder what it would be like if we had Hulda Clark over for Thanksgiving Dinner. Would I pass the Hulda Clark test? She’s very strict. Here are a few ideas on how to make a Thanksgiving Dinner that Hulda Clark would be proud of:

    1. Get a certified organic turkey.

    And not only turkey, but as many certified organic ingredients as possible for making Thanksgiving Dinner. Don’t let too many toxic chemicals, antibiotics, and GMOs crash your party.

    2. Use glass or stainless steel cookware.

    Hulda Clark recommended as little contact with metal as possible. For cookware, high quality stainless steel is the exception because it is the least likely to leach into its contents. How do you know if it’s high quality? Put a magnet to it. If the magnet sticks, you’re good to go.

    Instead of a copper or aluminum roasting pan and bakeware, use glass pyrex or stainless steel. Tie up your bird with twine, but don’t use the metal pins. Use stainless steel pots and pans. Use wooden spoons and spatulas for stirring. Use ceramic knives for chopping up vegetables. They’re extremely sharp and require no re-sharpening. Use a stainless steel knife for carving the turkey.

    3. Make everything from scratch.

    Let me share my recipes with you:

    There are millions of other recipes online. Choose the ones that have the least processed ingredients.

    4. Use bamboo forks and knives for place settings.

    As I explained in #2, Hulda Clark recommended as little contact with metal as possible. She lauded Asian cultures that use chopsticks for eating as a model of health.

    Think back to the fall of the Roman Empire due to its misuse of lead in irrigation pipes and goblets. This is the sound alarm that Hulda Clark points to in our civilization’s use of metal amalgams in many things such as cookware, tableware, tooth fillings, and so on.

    Switching to bamboo cutlery makes a giant dent in curbing our daily exposure to metal.

    5. Zappicate food before serving.

    Find pockets of time to zappicate food before serving. Turkey is supposed to rest for 30 minutes after being taken out of the oven. Let that rest time count by setting it on top of the Food Zappicator. (Make sure it’s on its serving platter and not the hot roasting pan to prevent from heat-damaging your North Pole Speaker Box.)

    Do the same for side dishes. Just a little bit of time on the Food Zappicator for some last minute zapping makes the food ready for a healthy meal.

    Do you think Hulda Clark would be proud of my Thanksgiving Dinner? Can you think of any other details I missed?

  • Lime Candle

    Lime Candle

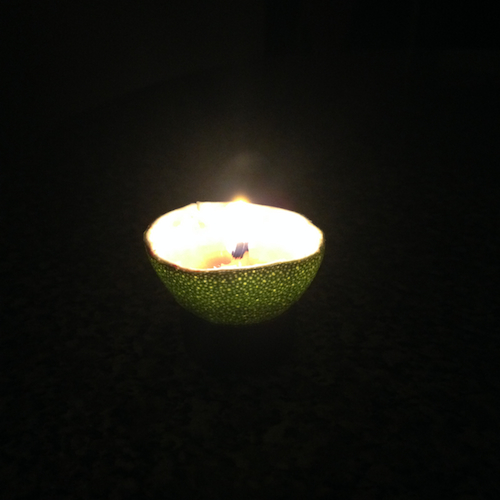
    I love this! Look at how the light comes prettily through the green lime peel. My daughter came up with this clever little decorating idea of turning lime peels into candles. She must have seen a tutorial on YouTube. The kid loves YouTube tutorials.

    Just clean out the inside part of the peel, leaving the center intact to serve as a wick. Pour a little oil into it. I used safflower oil because that’s what I have here at home. Then light up the wick. It may take a while before it catches a flame. The wick isn’t as dry as a cotton candlewick, so be patient. Once the wick browns it will start to catch a flame.

    Lime Candle

    This would look awesome as a table centerpiece for a romantic candlelit dinner. Valentine’s Day is coming up, and it’s on a Friday! Consider setting your dinner table with one of these. Better yet, float it on a wide vase of water to keep it safe.

    Make lime candles for spring, lemon candles for summer and orange candles for fall.

  • Cranberry Mini Tarts

    Cranberry Mini Tarts

    After many years of cooking a whole Thanksgiving dinner and getting my pace and timing down just right, I am taking a break. Tonight will be the first Thanksgiving dinner I will not be cooking. We are going to spend Thanksgiving with my husband’s side of the family, and Aunt Faye will be making us a fantastic old-fashioned Thanksgiving meal.

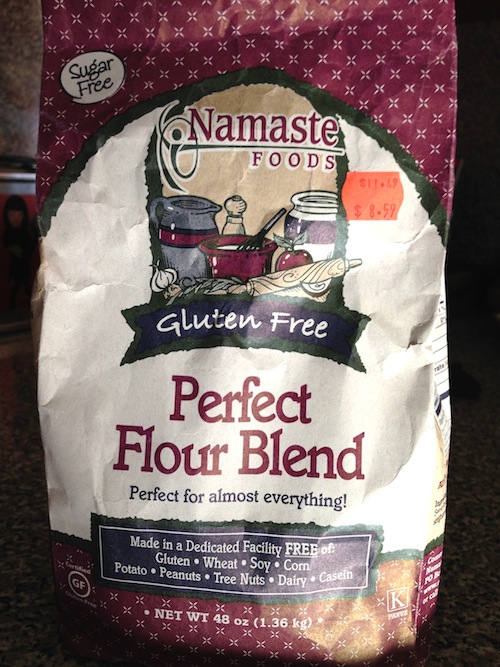
    Of course, I’m not coming empty-handed. I made these Cranberry Tarts at my daughter’s birthday party recently and they were a hit with everyone. The recipe is gluten-free and nut-free, very important since we have people with gluten and nut sensitivities in the family. I use Namaste Foods Gluten Free Flour Blend.

    Namaste Foods Gluten-Free Flour Blend

    My daughter helped me make these, and it was all we could do to keep ourselves from eating them all up before it’s time to go to Thanksgiving dinner.

    Before beginning, make sure you have the following kitchen tools:
    2 mixing bowls, small or medium
    measuring cups and measuring spoons
    whisk
    wooden spoon
    mini muffin pan
    colander
    oven

    Here we go…

    Cranberry Mini Tarts

    Ingredients for Crust:
    1 1/2 cups Gluten-Free Flour Blend
    3/4 cups organic butter
    6 oz. organic cream cheese

    Ingredients for Filling:
    1/2 cup organic sugar
    1 organic egg
    1/4 cup organic butter
    1 teaspoon organic vanilla extract
    8 oz. fresh cranberries

    Preheat the oven to 325 degrees Fahrenheit. Grease the mini muffin pan with butter wrapper.

    Beat together gluten-free flour, butter and cream cheese until it forms a ball of dough. I don’t have an electric mixer, so I just use a wooden spoon to combine the ingredients, then knead it by hand until it’s a nice smooth consistency.

    Pinch small portions, roll them up in balls, flatten and press evenly into the bottom and sides of mini muffin cups.

    Now we’re ready for the filling. Whisk together sugar, egg, butter and vanilla.

    Wash the fresh cranberries in a colander. Put about 5 cranberries in each mini muffin cup crust. This was like playing mancala.

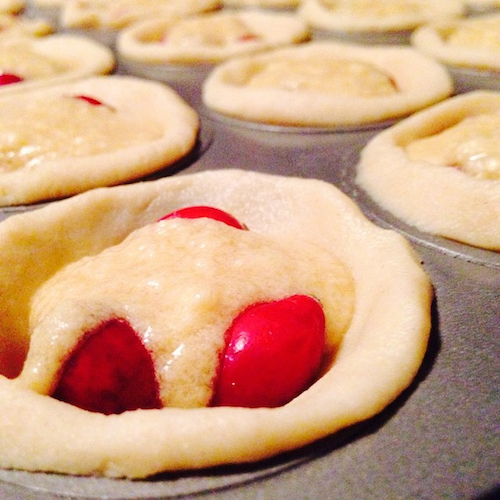
    Pour a small spoonful of filling over the cranberries in each mini muffin cup crust.

    Cranberry Mini Tarts Before Baking

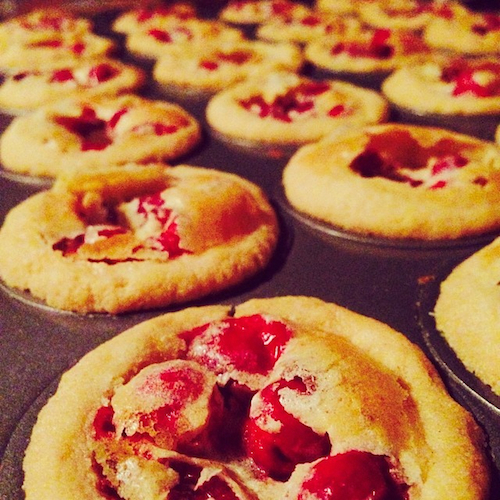
    Bake for 25 minutes, or until the tarts are golden. Let it cool completely then remove from pan.

    Cranberry Mini Tarts

    Share these treats with your family and friends!

  • Cranberry Apple Crisp

    Cranberry Apple Crisp

    It’s Christmas Eve, the wee one is asleep and we’re finishing up the last of the presents. Time for a little midnight snack. This Cranberry Apple Crisp makes kissing by the Christmas tree taste so good!

    Ingredients:
    3 organic granny smith apples, peeled, cored and sliced into 1/2 inch strips
    6 oz fresh cranberries
    1/4 cup organic sugar
    3/4 cups organic brown sugar
    1/2 cup organic all-purpose flour
    1/2 cup rolled oats
    3/4 teaspoon nutmeg
    3/4 teaspoon cinnamon
    1/3 cup organic butter, softened

    Preheat oven to 375 degrees Fahrenheit.

    Rub a pie pan with butter wax paper covers (I save them in the freezer for greasing baking sheets and pie pans and such). Add apples and cranberries to the pie pan. Sprinkle with sugar and toss until coated.

    Combine brown sugar, flour, rolled oats, nutmeg, cinnamon and butter in a medium bowl until well incorporated. Sprinkle on top of the fruit.

    Bake for 30 minutes or until golden brown.

    You can serve it hot with ice cream. I like it warm by itself on a cold winter night.

  • Homemade Pumpkin Puree

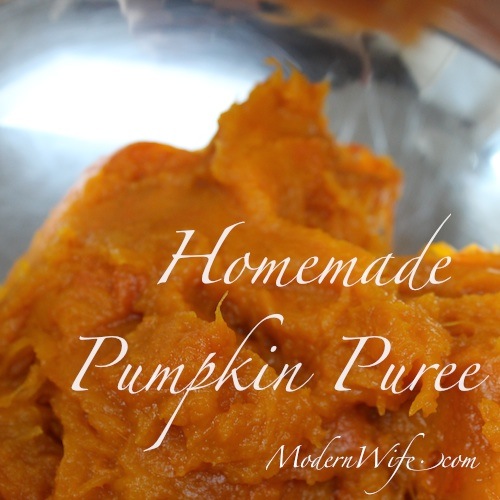
    Homemade Pumpkin Puree

    Roasting is my favorite way of making pumpkin puree. Not only is it the easiest way to do it, but oven heat also preserves the pumpkin’s sweet flavor.

    A pound is equal to a cup of pumpkin puree. I needed 2 cups of pumpkin puree for my pumpkin cupcake recipe so I picked a 2 pound sugar pumpkin.

    Preheat oven to 400 degrees Fahrenheit. Grease a baking sheet with butter. (Money-saving tip: I like saving the wax covers of butter sticks in the freezer. Whenever I need to grease a baking sheet, I get a wax cover out of the freezer and rub it on the baking sheet.)

    Cut the pumpkin in half crosswise. Scoop out the seeds and strings. Save the seeds for roasted pumpkin seeds.

    taking seeds off pumpkins

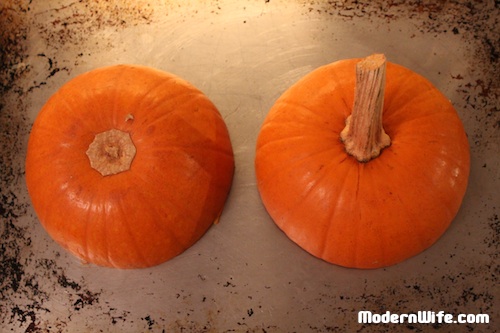
    Put the pumpkin cut side down on the baking sheet.

    pumpkin on the baking sheet

    Bake for 45 minutes. Check if skin can be pierced with a fork, then take it out of the oven and cool. Once the pumpkin is completely cooled, you can pull the skin off easily.

    pull skin off pumpkin

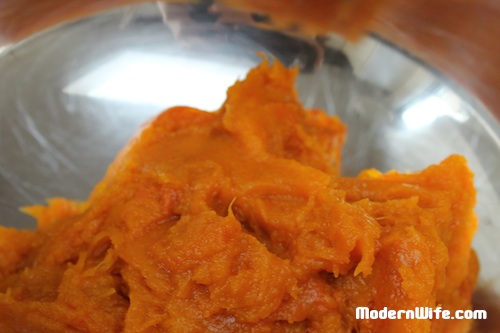
    Tadaa! Homemade pumpkin puree!

    pumpkin puree

    Now you’re ready to make pumpkin cupcake, or pumpkin cookies, or pumpkin pie or pumpkin ice cream.

    pumpkin cupcakes

    Instructions from the book, Halloween Treats: Recipes and Crafts for the Whole Family (Holiday Celebrations) by Donata Maggipinto

  • Pumpkin Chocolate Chip Cookies

    Pumpkin Chocolate Chip Cookies

    This recipe was passed on to me from my husband’s grandmother, who sent us care packages of her special Pumpkin Cookies every Halloween. Mammie used Crisco Oil and it made her cookies very moist and last for weeks. I used organic canola oil as a healthier alternative, and this makes the pumpkin cookies moist, light and fluffy. If you like your cookies crispy on the surface, use organic butter instead.

    This was previously posted at Pumpkin Cookies, but the way I had written it was confusing. I’ve revised the recipe to make it easier to follow. These Pumpkin Chocolate Chip Cookies have become such a family favorite that I have a feeling I’ll be making several batches of it throughout the holiday season.

    Mammie’s Pumpkin Chocolate Chip Cookies

    Ingredients:
    2 cups organic sugar
    1 cup organic canola oil (or softened organic butter – 2 sticks)
    2 organic eggs
    2 teaspoons organic vanilla
    2 tablespoons raw organic milk
    1 can organic pumpkin
    2 teaspoons baking soda
    2 teaspoons baking powder, aluminum-free
    1 teaspoon salt
    2 teaspoons cinnamon
    4 cups organic all-purpose flour
    1 large bag semi-sweet organic chocolate chips

    Pumpkin Chocolate Chip Cookies

    Preheat oven 375 degrees F. Whisk sugar, canola oil, eggs, vanilla, milk and pumpkin together until well incorporated.

    Pumpkin Chocolate Chip Cookies

    Add flour, baking soda, baking powder, salt and cinnamon and stir slowly with a spatula or a wooden spoon until smooth. Add chocolate chips and mix.

    Pumpkin Chocolate Chip Cookies

    Spoon rounds onto buttered cookie sheet (use wax paper covers to grease the baking sheet) and bake for 12 to 15 minutes. Take the cookies out as soon as they are showing a bit of brown around the outer edges.

  • Sweet Potato Marshmallow (and how to make Thanksgiving Dinner from Scratch)

    Sweet Potato Marshmallow (and how to make Thanksgiving Dinner from Scratch)

    Ever since I learned how to cook a traditional Thanksgiving dinner from my husband’s grandmother, I’ve been cooking and serving the same special meal my family looks forward to year after year. This year’s menu is no different. I keep it simple, but make everything from scratch.

    The tricky part is organizing and scheduling which dish to make when, so that everything is served nice and warm on the table at dinnertime. Here’s what I did:

    Set the turkey out to thaw the day before Thanksgiving. The night before Thanksgiving, roast a pumpkin and leave on the table to cool overnight. Also, make the stuffing and chill in refrigerator overnight.

    On Thanksgiving morning, make the Maple Cranberry Syrup and chill till dinner. Get the pumpkin puree from last night’s roast pumpkin and make Pumpkin Cookies and Pumpkin Pie.

    After lunch, start the turkey. In between basting the turkey, make the Sweet Potato Marshmallow, then the Mashed Potato and Steamed Broccoli. Toss the green salad and cherry tomatoes together last.

    Sweet Potato Marshmallow

    3 sweet potatoes
    1 bag large marshmallows

    Peel and cut sweet potatoes into 1 inch slices. Steam for an hour, then mash. Transfer the mashed sweet potato to a pie pan and let cool. Top with marshmallows. I wait until the turkey is out of the oven before I put the Sweet Potato Marshmallow in the oven to heat. Take it out and serve once the marshmallows are browned slightly.

  • Pumpkin Ice Cream

    Pumpkin Ice Cream

    Ingredients
    1 cup whole milk
    1/2 cup sugar
    1 15-oz can pumpkin
    2 cups heavy cream, chilled
    1 tsp vanilla extract

    Follow manufacturer’s instructions on how to prepare your ice cream maker.

    1. Heat whole milk in a medium saucepan until it bubbles around the edges.
    2. Whisk sugar and pumpkin puree into the heated milk.
    3. Transfer to a medium bowl and let it cool completely.
    4. Stir in heavy cream and vanilla.
    5. Chill for at least 30 minutes
    6. Churn the mixture in an ice cream maker for at least 30 minutes or until thickened into a soft-serve consistency.
    7. Freeze for at least 2 hours if a firmer consistency is desired.

  • Thanksgiving Turkey

    Thanksgiving Turkey

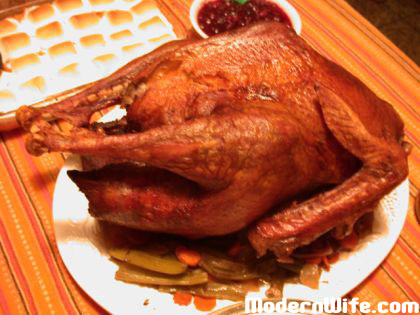
    I finally got me a Mary’s Free Range Heritage Turkey, fed no animal by-products, no preservatives. A true Thanksgiving turkey that’s lived its life healthily with lots of room to run around in. You can really taste the difference between one of these free-range birds and one that’s been farmed pumped with hormones, antibiotics and cooped up in a tiny cage. A free range Heritage Turkey is definitely a celebration of good harvest, abundance and food that warms the heart.

    Roast Turkey Recipe
    (for 8 to 10 lb turkey)

    Brine the Bird: After thawing, rub 2 tablespoons of kosher salt on the inside of the turkey cavity, then rub on the outside with about 1/4 cup of kosher salt. Let it sit in a glass or stainless steel roasting pan. Refrigerate 24 hours before roasting.

    Stuffing Ingredients:
    extra virgin olive oil
    2 celery stalks, chopped
    1 medium carrot, chopped
    1 large onion, chopped
    1 apple, chopped
    1/2 cup walnuts, chopped
    3 cups bread cubes
    1/2 teaspoon salt
    1 teaspoon thyme leaves
    1 teaspoon sage leaves
    ground black pepper to taste
    1/2 cup chicken broth

    Stuffing Directions:
    1. Heat oil to medium low in a large skillet.
    2. Saute celery, onions and carrots until softened, about 10 minutes.
    3. Stir in apples, walnuts, bread cubes and toss lightly.
    4. Sprinkle with all the spices and toss lightly.
    5. Add chicken broth and mix until well blended.
    6. Set aside to cool. Do not stuff turkey until stuffing cools off completely. Filling a turkey with warm stuffing invites bacteria.

    Turkey Roast

    1. Preheat oven to 325 degrees F.
    2. Rinse turkey well and pat dry. Stuff the cavity loosely and skewer
    or string up tight.
    3. Arrange a bed of celery, onion and carrot pieces in a large roasting
    pan. Place the turkey on the vegetables and pour 2 cups of water into
    the pan.
    4. Roast the turkey up to 4 hours, basting with sauce (recipe below) every
    30 minutes. Turkey is done when meat thermometer thrust into the breast
    reads 180 degrees Fahrenheit.
    5. Transfer turkey to a platter and allow to rest for 30 minutes to
    let the juices cook the turkey further.

    Turkey Gravy

    1. While turkey is resting, strain the pan juices into a saucepan.
    Heat to a simmer.
    2. Stir 1/8 cup flour in 1/4 cup water. Add to turkey juices. Let it
    boil, then simmer for 5 more minutes until thick. Season with salt and
    pepper.

    Basting Sauce

    Ingredients:
    8 tablespoons (1 stick) butter, melted
    1/4 teaspoon ground nutmeg
    1/4 teaspoon ground cloves
    1/4 teaspoon paprika
    freshly ground black pepper to taste

    Directions:
    Stir together all the basting sauce ingredients. Brush or baste the
    mixture on turkey every 15 minutes.

    basting a turkey

    Basting keeps the turkey moist as it roasts in the oven and gives the turkey that beautiful glazed crispy skin that graces the Thanksgiving Dinner table.