Tag: vegetables

  • Lettuce Mesclun

    Lettuce Mesclun

    I pinched my first harvest today, and it was the Lettuce Mesclun I received as a gift along with the rest of my order from Botanical Interests.

    I planted the whole package of Lettuce Mesclun on February 17 and started pinching individual leaves about 4 inches long today. Anything smaller is left on the ground so they can grow more. Information on the inside of the seed packet suggested cutting off 2 inches above ground level if I want to harvest whole heads. Whatever is left will grow more from the center.

    Seeds can be sown from as early as 6 weeks before last frost of winter till 2 weeks before first frost in fall. In USDA zone 8 or warmer (which is where I am) I can even sow seeds in fall for a winter harvest. Lettuce can survive in temperatures as low as 20F, though 70F is ideal for seed germination. I have mine planted on the north side of our house, and next to peas, for adequate shade that will protect the leaves from harsh sunlight. Summers are brutal here.

    First Harvest Lettuce Mesclun

    For now, these early harvests are so tender and sweet. I will be planting some more of these before it gets too hot.

  • Alfalfa Sprouts

    Alfalfa Sprouts

    Alfalfa sprouts are so good! We used to  buy them at the grocery store. We’d take this little plastic box home, open it and find alfalfa sprouts that were overpacked and soggy. So during my shopping splurge at Botanical Interests I bought Alfalfa Seeds for sprouting.

    The packet states that alfalfa seeds have the possibility of carrying E. coli and other foodborne bacteria, so the alfalfa seeds must be disinfected with a 2% bleach solution (1 teaspoon bleach to a cup of hot water). I’m not a big fan of bleach, especially when it comes to my food. Last I checked, bleach is toxic. So here’s what I did:

    I put 1 tablespoon alfalfa seeds in a quart mason jar, filled the jar with tap water and then put a 1/4 teaspoon of food-grade Hydrogen Peroxide (I brush my teeth with it too, but don’t try it unless you have absolutely no metal dentistry in your mouth). Let the alfalfa seeds sit disinfecting for 15 minutes. See the bubbles in the picture below? That’s the hydrogen peroxide doing its thing.

    Soak Alfalfa Sprouts in Water and food grade Hydrogen Peroxide

    Then I trapped a mesh net on the mouth of the jar with the band. I used the mesh net that my grocery-bought ginger was packaged in.

    Set up mesh net in Mason Jar lid

    When I poured the hydrogen peroxide water out, the mesh net trapped the alfalfa seeds in the jar. I refilled the jar with tap water poured in through the mesh lid. I let it sit overnight in a dark place.

    First thing the next morning, I poured out the water through the mesh lid, shook the seeds around so that they’re kind of stuck on the inside wall of the jar. I let the jar sit in the dark on its side so the seeds are all spread out instead of stuck together at the bottom of the jar.

    Rinse and repeat. About 3 times a day, I filled the jar with tap water, shook it around, poured the water out and let the alfalfa seeds sit in the dark spread out over the inner wall of the jar.

    Day 2 of Alfalfa Sprouts

    After 2 days the alfalfa seeds were sprouting. I put the jar out to get some sun, still doing the rinse-pour thing 3 times a day. With chlorophyll and the sun the sprouts got little baby green leaves on them. Time to eat!

    Alfalfa Sprouts and Sweet Peppers on Tuna Sandwich

    Why go to all this trouble? Here’s 9 Health Benefits of Alfalfa Sprouts.

  • Carrot Cupcakes

    Carrot Cupcakes

    When my daughter was two we spent the year in Maine. Her Grammy grew a garden and took the wee one out to pick carrots throughout the summer. Grammy has now been dead for two years, but my daughter, now 8, still thinks fondly of her and those freshly picked carrots. So in honor of the coming of spring and of Grammy’s recent birthday, we made Carrot Cupcakes. Happy birthday, Grammy!

    Ingredients:
    2 cups all-purpose flour, unbleached
    2 cups organic sugar
    3 cups shredded organic carrots
    1 teaspoon baking powder
    1 teaspoon baking soda, aluminum-free
    1 teaspoon cinnamon
    1 cup organic canola oil
    4 large eggs, free-range and organic

    Preheat oven to 350 degrees Fahrenheit. Prepare cupcake pan with cupcake liners. Mix all the ingredients together in a large bowl until smooth. Pour into cupcake pan cups only about halfway to 3/4 of the way. Bake for 20 to 25 minutes. Test with a fork and when it comes out clean, the cupcakes are done. Cool completely before frosting.

    Frosting:
    10 oz organic cream cheese
    10 tablespoons organic butter, softened
    3 1/3 teaspoon orange extract
    5 cups organic powdered sugar

    Beat the cream cheese and butter together until creamy. Stir in orange extract and powdered sugar gradually.

  • Garden Update

    Garden Update

    My Shade Garden is coming along nicely. Most of it, at least. I planted early spring plants such as peas, sugar snap peas, broccoli, lettuce, radishes and beets on February 16 and 17.

    Remember those Sugar Snap Peas I got from Botanical Interests that I planted a while back? Here they are now!

    Sugar Snap Peas Sprouted and Growing

    Aren’t they happy?

    The radishes are perking up adorably as well. Here’s one. I love its red stems and heart-shaped leaves.

    Radish sprouts

    I can’t wait to see these underground beauties.

    Radish Seeds from Botanical Interests

    The lettuce, broccoli, spinach and beets have also sprouted, but I’ll wait a little bit until they’re bigger before I take pictures.

    Someone has been messing around in my garden. I don’t know if it’s a bird or a little mammal, but I really need to figure out a way to keep my plants from getting eaten. I have both a cat and a dog, and the neighbors’ cats come over to play too. You’d think we’d keep the rodents and birds in check, but I still see a lot of gopher holes throughout the lawn.

    I was thinking of maybe building some kind of Arduino-powered robot-scarecrow to create a motion-detecting alarm to scare off little creatures. Still tossing around some ideas. Maybe something as simple as solar-powered or wind-powered kinetic sculptures would be sufficient.

    As for the Little Marvel Shelling Peas I had leftover from last year, I wrote about refrigerating them before putting them in the ground. I think I read about it somewhere in an old copy of The Old Farmers Almanac. Well, my peas took a very long time to emerge. The Sugar Snaps were way further along before I saw even just a peep of the peas. I finally saw some of them this weekend.

    Late Bloomers in the Shade, Little Marvel Peas

    What else have I got to report? Remember the rose bushes I pruned and fed banana peels? They are growing so big and beautiful. Here’s Security, the Rose Bush with the killer thorns by my daughter’s window.

    Security, the Rose Bush

    The Olive tree is sprouting shoots at its base.

    Olive Tree sprouting shoots

    I think I may take cuttings this summer and see if we can grow more of this Olive tree that is so rich in symbolism.

    Daughter and Dog under the Olive tree

  • Quinoa Asparagus, Oregano Chicken

    Quinoa Asparagus, Oregano Chicken

    Doesn’t that sound like a martial arts movie with English subtitles? Maybe not.

    How about this one? Vegetarian cook for meat-loving… what rhymes with cook?

    I have a new challenge in the kitchen. I don’t want to eat meat anymore. Why be a vegetarian? I came up with these answers when I was 16, the first time I quit meat.

    1. Meat tastes sweaty. It’s flesh. If we were meant to eat meat, we would enjoy the taste of it raw the way carnivorous animals do. We do so much to make meat palatable – marinades, sauces, spices, rubs – but on its own, meat is gross.
    2. Industrial meat farms are evil. Overcrowded, dirty, drugged and abused animals is where meat comes from. I don’t want to support that evil with my money.
    3. We are what we eat. We eat our food’s life force, its fear, its sadness or its happiness. I have nothing against killing animals for food, just like I have nothing against carnivorous animals. What I care about is that animals lived a full life according to their nature before they are killed for food. Animals I described in #2 above are not the kind of energy I want in me.

    You’re probably thinking, so what? Lots of people are vegetarians and there are a lot of vegetarian recipes online, that’s really not much of a challenge. Well, my husband and my daughter love meat. In fact, the reason I started eating meat again was my baby.

    There we were, Jay and me eating at a sunny diner, when suddenly there was this foreign urge in me to reach a fork out to his plate. “Can I have that sausage patty?” I asked.

    He looked at me funny. I felt funny. It was as if my baby’s little fingers came through my vegetarian belly to grab a bite of that sausage patty. Weird. But I went with it. I ate meat throughout my pregnancy.

    Now it’s 8 years later and I’m quitting meat again, only this time I have to feed two meat-loving freaks in my family too.

    Since I first quit meat, there have been some changes in the meat industry. There are meat farms that raise their animals ethically. I scour grocery labels for the words, “free-range,” “grass-fed,” “free-roaming,” “organic.” It’s important to me that the meat I bring home came from animals who lived happy lives, and that I am supporting farms run by good people.

    So here’s what I did for dinner last night. I started out baking Oregano Chicken for the meat freaks. Then I made Quinoa Asparagus for me, and as a side for the chicken. This is like a double protein meal for the meat freaks, because quinoa is rich in protein. Raw salad rounds off the meal.

    Baked Oregano Chicken

    Ingredients:
    1/4 cup organic butter
    Juice of 1/2 a lemon
    2 tablespoons Bragg’s Liquid Aminos
    2 teaspoons dried organic oregano
    1 lb of organic chicken

    Preheat the oven 375F (or 190C).

    Lay those chicken pieces in a baking pan. I used a square glass pyrex pan about 9×9, just enough room to keep the sauce together.

    Melt the butter in a small stainless steel saucepan. Add lemon, Bragg’s Liquid Aminos and oregano. Stir it up, then pour on top of the chicken. Bake for 30 to 45 minutes, until the chicken is cooked through.

    Quinoa Asparagus

    Ingredients:
    4 cups of water
    2 cups quinoa
    2 tablespoons extra virgin organic coconut oil
    1 green onion
    1 bunch organic asparagus
    1 teaspoon oregano
    Juice of 1/2 lemon

    Bring water to a boil, then add quinoa. Cook until the quinoa has absorbed the water.

    While waiting, heat 1 tablespoon coconut oil in a large skillet until it melts in the pan. Add green onions, asparagus, oregano. Sprinkle about a teaspoon of water to steam the asparagus. Cook until asparagus is tender but not mushy. Mix in the quinoa. Squeeze half a lemon, and stir in the remaining 1 tablespoon of coconut oil.

    What’s in my salad? Lettuce, broccoli, cauliflower, cucumber, grape tomatoes. These vegetables taste so good, I don’t dress them at all. That’s right, naked organic vegetables. So good.

  • Soaking and Sowing Sugar Snap Peas

    Soaking and Sowing Sugar Snap Peas

    Some of the earliest crops to arrive at the Farmers Markets are peas: Snow Peas, English Shelling Peas, Sugar Snap Peas. We love them. In our family we just shake some kosher salt with Sugar Snap Peas and snack on them when they’re fresh in the spring. I can’t wait to taste them just-picked from our backyard garden.

    I still have Shelling Peas to plant from last year, so this winter when I shopped for seeds at Botanical Interests, I bought Sugar Snap Peas.

    Sugar Snap Peas Seed Back of Packet from Botanical Interests

    Botanical Interests has only non-GMO and untreated seeds. They have a great selection of organic and heirloom seeds. They pack so much information on their seed packets. Nothing is wasted. There’s more to read on the inside of the seed packet.

    Sugar Snap Peas Seed Inside Packet from Botanical Interests

    We’ve been tilling and weeding our Shade Garden for the past few days now. As soon as the seeds are ready they are going in the ground. The Shelling Peas are in the refrigerator. Peas love cold. Sugar Snap Peas have to be soaked in water for 12 to 24 hours before sowing in the ground.

    Sugar Snap Peas Seed Packet from Botanical Interests, Special Germination Instructions

    I took a piece of paper towel and folded it in two, cut it to fit in this DIY HDPE tray. Watch my husband make these HDPE trays from empty Arrowhead Water jugs.

    They look so space age, don’t they? Very versatile, easy to store because they stack. We can use them for pretty much anything. If I’m soaking seeds, I can slip the seed packet between the two nested trays, so I don’t forget what I’ve soaked.

    HDPE trays DIY recycle empty Arrowhead Water Jugs

    Get the paper towel wet and put the seeds between the folds. Set it aside in a cool dark cabinet.

    Soaking Sugar Snap Peas

    The next day, the Sugar Snap Peas have absorbed the moisture from the paper towels. They are engorged and juicy.

    Soaked Sugar Snap Peas are Moist and Engorged

    I sow them 2 inches apart, like the packet instructs. I’m expecting these peas to sprout next week.

    Sowing Sugar Snap Peas

    There’s still time to get your Sugar Snap Peas seeds from Botanical Interests. Peas are super-amazing plants because aside from being a delicious and nutritious raw snack, their roots also add nitrogen to the soil. Apparently peas stop producing once the weather gets hotter than 70F, so when it does, the soil is ready for the next crop. Such a giving vine!

  • Garden Plan

    Garden Plan

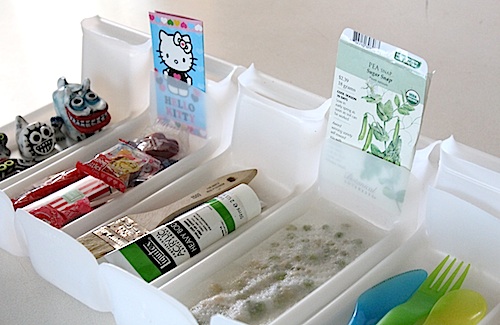
    As soon as my seeds arrived from Botanical Interests, I sorted them out in order of when they need to be planted. I also included seeds I bought last year, and seeds we’ve been saving all year. I came up with a rough garden plan. It went through several revisions once we started working and sowing in the garden. It’s important to keep track of what was planted where so that next year we can mix it up and make sure each plant gets to know a whole new part of the garden. Keeps the soil healthy and happy.

    Shade Garden

    First in are all the seeds that love cold weather and would grow with at least 3 hours of sun a day. I picked a spot behind the house. It’s the only shady place on the whole property, and it’s close to a faucet and garden hose. While tilling the soil, we found old rusty nails and parts of rusty tools, an indication that at some point in the distant past, someone had a garden there too.

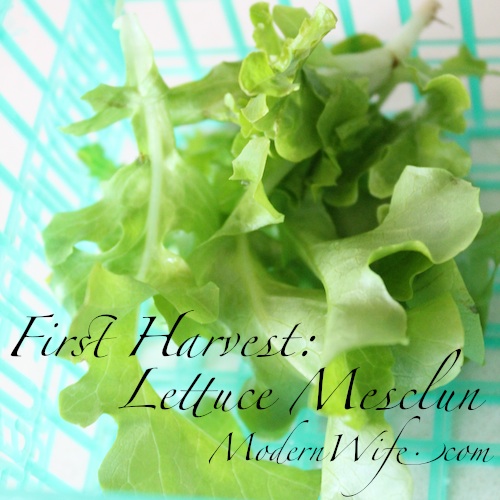
    Advantages of growing these plants in the shade: I don’t have to water as much. The shade keeps the plant bed moist for a longer period of time. The leaves don’t get torched by the sun, especially important to leafy green vegetables such as spinach and lettuce.

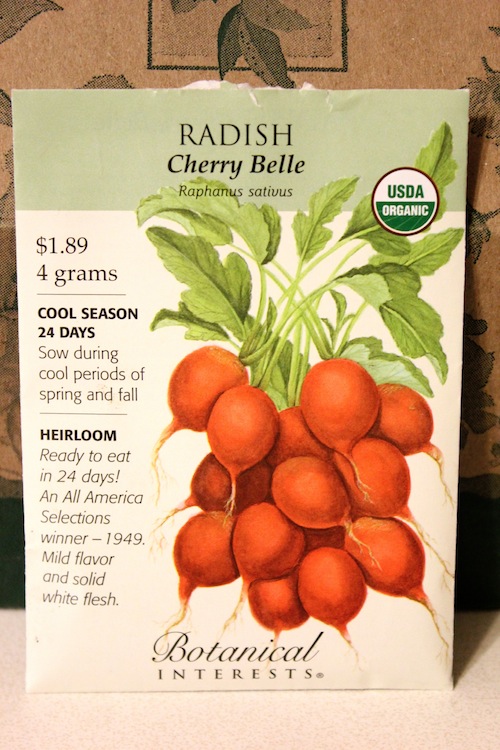
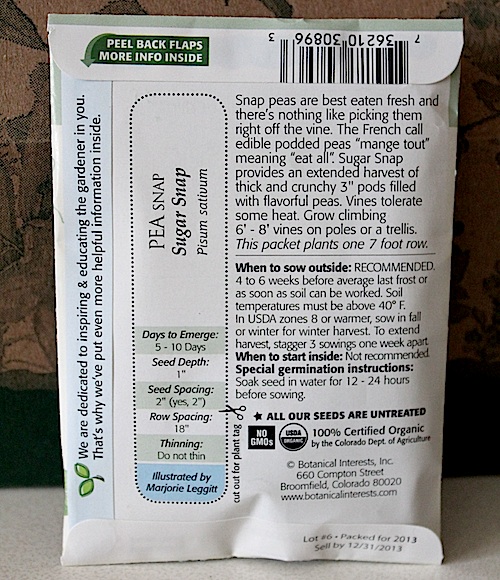
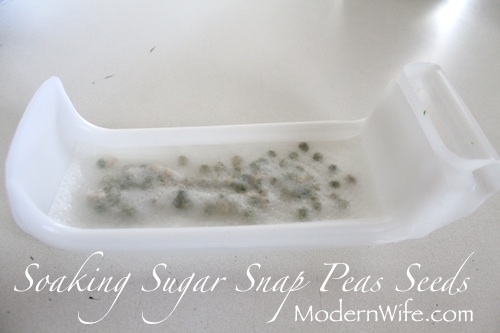
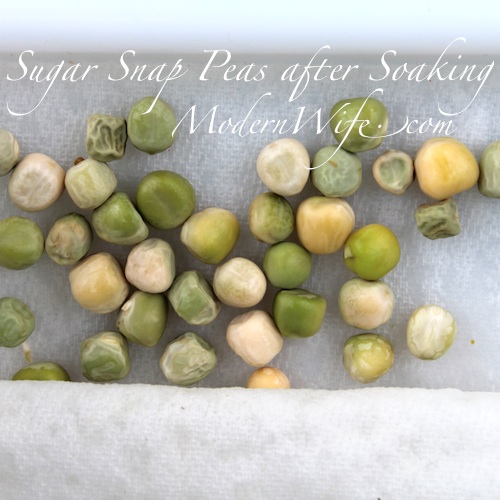
    What I planted in my Shade Garden: peas, sugar snap peas, spinach, lettuce, radish, beets and broccoli. We’re expecting harvest starting mid-March through the rest of spring.

    Shade Garden started February 2013

    Herb Garden

    Next up are cool season herbs. These herbs like full sun to partial shade, so I’m planning on sowing them in front of the house, which faces south, but is given partial shade by large evergreens. We have raised beds surrounding the house and a couple of small ones in front.

    Going in the Early Spring Herb Garden: parsley, cilantro, sage, chamomile, lavender, calendula.

    Adding to the Herb Garden after Spring has sprung: thyme, oregano, basil.

    Sun Garden

    After last chance of Spring frost is over, we’ll be starting the Sun Garden: basil, tomatoes, cherry tomatoes (basil and tomatoes are best companion planting buddies), corn, carrots, cucumber, green beans, zucchini, summer squash, sweet peppers, red bell pepper, watermelon, cantaloupe, and sunflowers.

    Pumpkin patch: My daughter is a Halloween baby, so we want our pumpkin patch to be a big celebration. Three different kinds of pumpkins: Jack O’Lantern pumpkins for carving, sugar pie pumpkins for yummy treats and Jack Be Little pumpkins for decorating.

    Seeds from Botanical Interests

    Fruit Trees

    I save all seeds from fruit we eat. I’m planning on sprouting these seeds and growing them in pots until they’re big enough to transplant into soil. It could take years, but I have to start sometime. Apricot, different kinds of apples, lemon, cherries, tangerine, plums, pear, pine.

    We also have grown trees that are sprouting babies at their roots. Olive and various other evergreens. I wonder if I could grow them from cuttings.

    I don’t know if I’ll get to everything. I certainly have a full plate. I’ll be updating these garden plans as we go along. This is going to be an amazing year!

  • Botanical Interests

    Botanical Interests

    Package from Botanical Interests

    I got my seeds from Botanical Interests! They came in this pretty box which fits nicely in my mailbox.

    Package from Botanical Interests

    A while back I was thinking about seeds and the recent defeat of Proposition 37 here in California. Without mandatory labeling of GMO seeds and food, I will have to assume something is genetically modified, unless they voluntarily state otherwise. The Non-GMO Project is an awesome guide to finding non-GMO products. The Cornucopia Seeds I bought at my local OSH last fall were marked “Not treated or genetically modified” right on the packet. Mike at Urban Organic Gardener wrote about Sources for Buying Non-GMO seeds. The comments thread is really really interesting. One of the commenters posted a list of seed companies owned or supplied by Monsanto. They could be selling organic or non-gmo seeds and still be making money for the Evil Empire. Well, I was glad to know that the seeds I got last fall have nothing to do with Monsanto. And this winter I bought my seeds from Botanical Interests, which sells non-GMO organic and heirloom seeds. They are not on the list of seed villains. And they have these lovely illustrations on the packets. That goes a long way with me.

    Seed packets from Botanical Interests

    I bought so many seeds! I admit I got a little carried away. For less than the price of one trip to the grocery store, I just bought my family’s vegetables all year. I also received a complimentary packet of Lettuce.

    With these non-gmo organic seeds, and our own gardens that we’ll tend using organic gardening practices, we will be eating better than we ever have. I imagine just-picked sugar snap peas crunching in my mouth, not having soggy or dried out vegetables in the refrigerator, everything eaten just after snipping it off the plant. Does that sound like heaven to you?

  • Husband’s Breakfast Recipe: Emphysema Lambada

    Husband’s Breakfast Recipe: Emphysema Lambada

    Yes, you read it right. My husband made me breakfast. How sweet! He really is a good cook. Check out his bean soup here. And he also came up with the idea for Bumblebees. But in true Jay fashion, he gave his recipe the unappetizingly strange and thoroughly nonsensical name, Emphysema Lambada.

    It’s good, though. Don’t knock it till you try it. Here’s the recipe:

    Ingredients:
    1 organic carrot, peeled and chopped
    1 organic celery, diced small
    2 organic green onions, chopped
    some organic frozen mixed vegetables (it’s got peas, corn and carrots in it, I think he used about a third of a package.)
    1 organic beef hotdog, chopped up as thin as possible
    1 tablespoon organic canola oil
    1 organic egg from free roaming chicken
    salt and pepper to taste

    Heat the oil in a large skillet over medium heat. Saute the carrot, celery, green onions, mixed vegetables and hotdog. When the vegetables are tender, make a hole in the middle of the skillet and crack the egg in it. Scramble the egg and mix it up with the rest.

    Husband's Breakfast Recipe: Emphysema Lambada

    Serve warm as is. Or do what my husband did: he set some rice to steam before he started so that by the time the rice is cooked, we are ready to Lambada on top of rice.

  • Beef Barley Soup

    Beef Barley Soup

    A big vat of hot soup is comfort food in the winter. What’s really awesome about soup is that it gets better after it has sat together, chilled in the refrigerator, then reheated next day. This recipe feeds my 3-person family for two days, and is a great classic meal.

    Ingredients:
    1 lb. lean ground beef, free-range, grass-fed and organic
    1 organic onion, chopped fine
    1 can (14 oz.) diced tomatoes, organic
    1 teaspoon dried oregano
    2 cups beef broth, organic
    4 cups water
    3 organic carrots, peeled and chopped
    3 ribs organic celery, diced
    1/2 cup pearl barley, organic
    2 pieces organic green onions, chopped
    salt and pepper to taste

    In a large saucepan or stock pot, brown ground beef over medium heat, breaking it up with a spatula. Drain the grease that comes out of the beef. People seem to be mystified about how to do this properly. Never ever drain the grease into your kitchen sink. You are asking for trouble, you bad kitty! Grease hardens when cold, so your kitchen sink will clog up if you pour that grease down the sink.

    I use a Pot Drainer to drain the grease into an empty can I keep next to the stove. I keep adding grease to it until it’s about 3/4 full. Let the grease harden in the can before throwing it out, can and all.

    Stir in onion and cook until glassy. Add tomatoes, oregano, broth, carrots, celery and barley. Bring to a boil, then return to a simmer on low. Cook for an hour until barley is tender. Add green onions. Season with salt and pepper to taste.