• My Daughter’s Snack Recipe

    My Daughter’s Snack Recipe

    I don’t remember when my daughter started helping me in the kitchen. Was it at age 3 or was it even younger? I remember her taking initiative making us snacks not even a mother could love.

    Now that she’s 8 she’s become quite a cook. She can cook her own breakfast eggs. She’s been my assistant for the past two Thanksgivings, peeling and slicing potatoes like a big girl. She’s also got those really strong arms from gymnastics. The girl can whisk like a pro!

    Today she made another one of her no-bake snacks, but this time she wrote her recipe out.

    Malaya's snack recipe

    I asked her what the letters stood for. Here’s what she told me:

    C.C. – cupcake liner
    G.M. – granola Mom’s
    M.S. – marshmallows
    Sh.W. – sugar white (in our house that’s organic evaporated cane sugar)
    H.W. – honey raw
    R.O. – raisins organic

    And what does M.W.H.B. with a circle and backslash stand for?

    No Mother With Hanging Butt. 😐

  • Mini Cinnamon Rolls

    Mini Cinnamon Rolls

    Whenever I make pies I wind up with extra dough from the pie crust. I hate throwing anything away, especially my pie crust. It’s so good! So I’ll tell you what I do.

    Preheat oven to 350 degrees Fahrenheit.

    Mix up organic sugar and organic cinnamon. I’d say about 1 teaspoon cinnamon to about 1/4 cup of sugar. Mix it up good. Flatten that leftover pie crust dough with a rolling pin and sprinkle the cinnamon sugar all over it. Roll up the pie crust, jelly-roll-style, then slice it up thin. Arrange the cinnamon rolls on a baking sheet and bake for 10 to 15 minutes or until golden brown.

    Fun little treats!

  • Chicken Pot Pie

    Chicken Pot Pie

    A friend once told me that one night each winter his whole family gets together for Pie Night. Everyone brings a pie. Some bring dessert pies, others bring meat pies. Pies are so wonderful in the winter. Pies stay warm for a long time and warms the heart all night.

    Pie Crust

    This is the same pie crust recipe I have for Pumkin Pie. It’s flaky just the way I like it.

    Ingredients:
    3 cups pastry flour
    1 cup (2 sticks) butter, softened
    pinch of salt
    1/2 cup iced water

    Mix flour, butter and salt, until mixture is in crumbs. Toss with iced water. Do not overmix. Divide pie crust dough into two. Roll out one part of the dough and lay in a pie pan. Roll out the second part of the dough and cut out holes to let the steam out.

    Chicken Filling

    Ingredients:
    1/3 cup organic butter
    1/3 cup chopped organic onion
    1 pound skinless, boneless chicken breast tenders, organic and free-range
    1 cup sliced organic carrots, steamed
    1 cup frozen organic green peas, steamed
    1/2 cup sliced organic celery, steamed
    1 3/4 cups chicken broth
    1/3 cup all-purpose flour
    1/2 teaspoon salt
    1/4 teaspoon black pepper

    1. Preheat oven to 425 degrees Fahrenheit.
    2. Cook onions in butter over medium low heat until the onion is glassy. Add chicken and cook until browned.
    3. Stir flour into chicken broth and pour into the chicken mixture. Simmer until thick.
    4. Add carrots, celery and peas. Add salt and pepper to taste. Fold together until nice and creamy.
    5. Pour chicken mixture into pie crust. Cover with top crust.
    6. Bake for 30 to 35 minutes or until pie crust is golden brown. Cool slightly before serving.
  • Cranberry Apple Crisp

    Cranberry Apple Crisp

    It’s Christmas Eve, the wee one is asleep and we’re finishing up the last of the presents. Time for a little midnight snack. This Cranberry Apple Crisp makes kissing by the Christmas tree taste so good!

    Ingredients:
    3 organic granny smith apples, peeled, cored and sliced into 1/2 inch strips
    6 oz fresh cranberries
    1/4 cup organic sugar
    3/4 cups organic brown sugar
    1/2 cup organic all-purpose flour
    1/2 cup rolled oats
    3/4 teaspoon nutmeg
    3/4 teaspoon cinnamon
    1/3 cup organic butter, softened

    Preheat oven to 375 degrees Fahrenheit.

    Rub a pie pan with butter wax paper covers (I save them in the freezer for greasing baking sheets and pie pans and such). Add apples and cranberries to the pie pan. Sprinkle with sugar and toss until coated.

    Combine brown sugar, flour, rolled oats, nutmeg, cinnamon and butter in a medium bowl until well incorporated. Sprinkle on top of the fruit.

    Bake for 30 minutes or until golden brown.

    You can serve it hot with ice cream. I like it warm by itself on a cold winter night.

  • Gingerbread Cookies

    Gingerbread Cookies

    It’s the afternoon before Christmas Eve, and my 8-year-old daughter is itching for something to do. Presents are wrapped. Too early for a movie. We turn into Cookie Monsters and bake up a batch of Gingerbread Cookies!

    Gingerbread Cookies Ingredients

    Ingredients:
    3/4 cup (or 1 1/2 sticks) organic butter
    3/4 cups organic brown sugar
    1/2 cup molasses
    1 egg, organic and from free range chicken
    1 teaspoon vanilla
    3 cups organic all-purpose flour
    2 teaspoons ground ginger
    1 teaspoon ground cinnamon
    1 teaspoon baking soda
    1/4 teaspoon nutmeg
    1/4 teaspoon salt

    Preheat oven to 350 degrees Fahrenheit.

    Beat butter and sugar together in a medium bowl until smooth. Add molasses, egg and vanilla. Whisk very well. It will take quite a bit of elbow grease to make it smooth, but carry on. It will be worth it.

    Add flour, ginger, cinnamon, baking soda, nutmeg and salt. Beat with spatula until well incorporated.

    On a lightly floured surface, roll out dough a little bit at a time to 1/4 inch thickness. Use cookie cutters to cut shapes. Lay an inch apart on baking sheet. (Since I don’t use non-stick cookware, I save the wax paper covers of butter in the freezer and rub my baking sheet with it when I’m baking.)

    Bake for 8 to 10 minutes or until cookies begin to brown. Cool on wire racks, then decorate.

    Here are some fun ideas for decorating your Gingerbread Creatures.

    Happy Holidays!

  • Chalkboard Linen Closets

    Chalkboard Linen Closets

    Since we moved into this old ranch-style farmhouse in the winter, we did not want to paint the walls and be stuck indoors with the smell of fumes. But there are child’s scribbles on some parts of the walls including these white linen closets. I tried and tried to scrub them off but they would not come off.

    Linen Closets Before

    Inspired by the child’s scribbles, my husband rolled two layers of Chalkboard Paint on the Linen Closet Doors. It only took one 30-oz. can of Rust-Oleum Chalkboard Paint to do it.

    Rust-Oleum Chalkboard Paint and Painters Masking Tape

    Materials: Rust-Oleum Chalkboard Paint, Painters Masking Tape, Paint Roller, Metal Paint Tray, Drop Cloth, Sandpaper, Fan.

    Sand your surface, make sure it’s clean. Masking tape the edges to make sure you don’t smudge past what you want to paint. Set up your drop cloth under your workspace. Then lay that paint. Since we are doing this in the winter, we had to keep one window open and run the fan. Instructions say wait 4 hours before rolling that second layer, and wait 4 days before using the chalkboard.

    To prepare the Chalkboard, rub the whole surface with chalk, then erase. Now we’re all set to draw or write or scribble or doodle. I’ve never drawn this big!

    Linen Closet Chalkboard

    I love my 8 year old daughter’s chalkboard art!

    Chalkboard Art by Malaya age 8

    She takes after her Dad.

    Todays Menu by J.E.Moores of JEMTOY

  • Chicken Kitchen

    Chicken Kitchen

    We just recently moved to an old ranch-style farmhouse on a 3.6 acre property. There’s a lot to do, and many springtime dreams of starting a garden, raising chickens and a beehive. Upon move-in, though, my first priority was to clean and set up the kitchen.

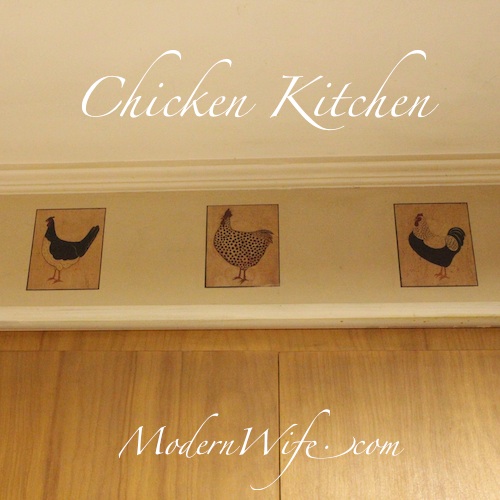
    Let me show you our kitchen, the Chicken Kitchen.

    Chicken Kitchen Before

    The Chicken Kitchen is a charming old farm kitchen, with lots of chicken accents all over. We’ve got the chicken runner under the ceiling, the chicken tiles and the chicken cabinet knobs. Not in the picture are chicken light switches, chicken chain pulls on the ceiling fan, and a chicken sink drain strainer. Chick chick chicken!

    There was a layer of greasy dust everywhere, from the tops of the ceiling runner, the cabinet knobs, drawers and shelves. Don’t even get me started on the stove.

    Chicken Kitchen Drawer Before

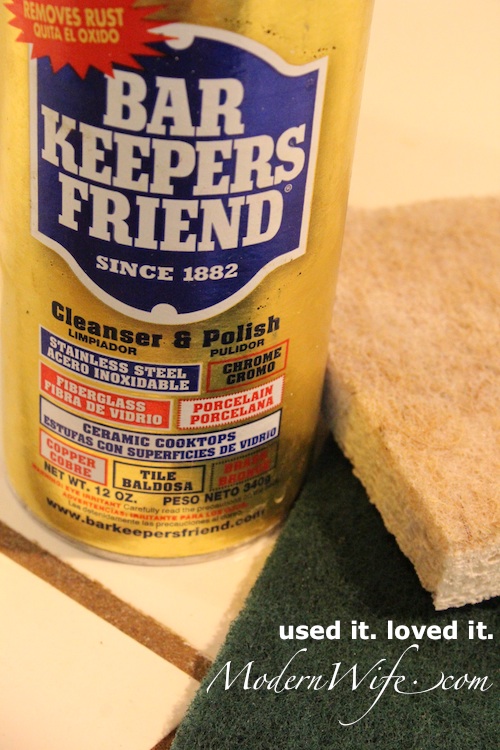
    So I pulled on the rubber gloves and set to work. First I threw away all toxic chemical cleaners and bleaches. I only used water, heavy duty scouring pads, scrub sponge and for really greasy hard-to-scrub areas, Barkeepers Friend.

    Barkeeper's Friend

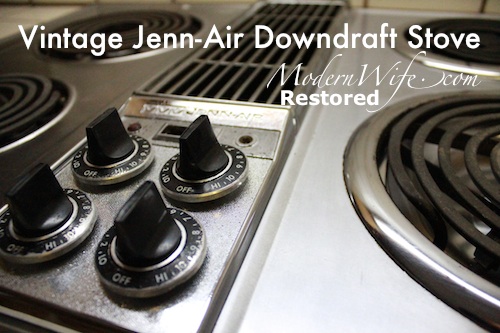
    This vintage Jenn-Air Downdraft Stove was so caked with burnt grease on the stove rings. The burner plates were black and ready to crumble into dust. The downdraft filter was gross, and I fished out a fork, an old spaghetti, and old food caked at the bottom. (Sorry if I’m making you lose your lunch. I skipped taking a picture because I didn’t want to lose my lunch.) The grill and griddle cartridge set was so caked with grease I deemed it beyond restoration, so it went to the trash. (I spied a used set on eBay for less than $50 plus shipping, so maybe, maybe after Christmas…) But the burners were fine. With a lot of elbow grease and new burner plates, this stove is back in business. Look at that polished chrome!

    Vintage Jenn-Air Downdraft Stove

    I scrubbed the greasy dust off the ceiling, runner and molding. No grease or dust was safe from me. Everything got the rub down.

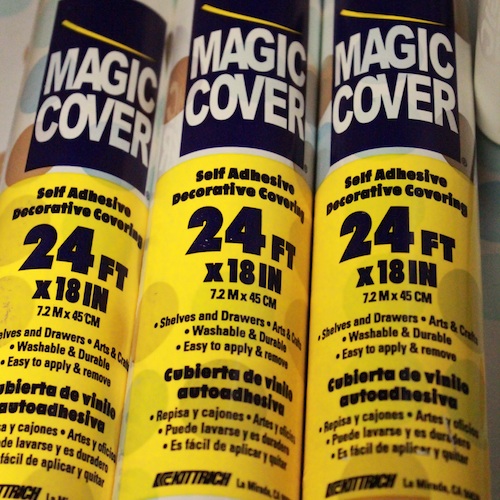
    When all was scrubbed and clean, I bought about 5 rolls of Magic Cover Self-Adhesive Shelf Liners in Polka Dots for the drawers and shelves. They’re over $7 per roll, and they really perk up my kitchen.

    Magic Cover

    I measure my surface and cut the contact paper to size. If it’s a small piece, I peel all the backlining paper off. If it’s a large piece I peel off just a corner or a side. I put the contact paper into position and press down, peeling off the backlining paper as I press the contact paper down, smoothing out bubbles and wrinkles as I go.

    Chicken Kitchen Lining the Drawer and Shelves

    Some of my shelves and drawers are unfinished wood, a little splintery, so I cut out extra on the sides so I can fold it over and cover the edges as well.

    Chicken Kitchen Drawer

    We removed the microwave since we don’t use it, covered the hole with contact paper and turned it into my breadmaker cave.

    Chicken Kitchen Breadmaker

    Thanks for visiting the Chicken Kitchen.

    Chicken Kitchen Knobs

  • How to Make an Evergreen Wreath the Hard Way

    How to Make an Evergreen Wreath the Hard Way

    Our Christmas tree is up! With the move we were a little worried we wouldn’t get our Christmas tree up in time, but we made it.

    We had to cut off the lowest branches to make our tree fit our stand, so I had a lot of extra branches to make a wreath with. Only I wasn’t planning on making a wreath. I’ve never made a wreath before, and I have no idea where to begin.

    I looked at websites about making a wreath, and of course Martha Stewart had something to say about it too. But I didn’t have any of the fancy wreath forms and I didn’t feel like going out to buy any. (It’s cold out!)

    So here’s my take: How to Make an Evergreen Wreath the Hard Way.

    How to make an evergreen wreath the hard way

    Get those tree loppers, needlenose pliers and some wire. All I had at home was my husband’s sculpting wire. It’s thick and hard to bend, but with leather gloves on I muscled it. First I lopped the branches into smaller twigs. I connected those twigs using the wire, and made a long garland, then turned the garland into a circle and wired it up. I was going to trim it so that it didn’t look so bushy, but then I decided I could only mess it up at this point, so whatevs. I made a loop with the wire, for hanging. And hung up more toys on it, to complement our toy-laden Christmas tree.

    There was still more extra branches so I made a little carpet underneath the fireplace. Our house may still need a lot of work, but it’s warm and it smells like pine. We’re home!

    What to do with Christmas tree trimmings

  • Crunchy Pizza

    Crunchy Pizza

    Shakey’s Pizza in the Philippines has this super awesome pizza on their menu: Pepperoni Crunch. It’s a thin-crust pepperoni pizza with potato strings on top to make it crunchy! We’d order that with a tall tower of rootbeer and some mojos. Delish!

    Now that we’re back stateside, we miss it. So I got out my breadmaker pizza crust recipe and set to work making my version from scratch. It’s easy. I’ll show you how.

    Breadmaker Pizza Crust

    Ingredients:
    3/4 cup water
    1 tablespoon organic canola oil
    1 tablespoon organic sugar
    1/2 teaspoon salt
    2 1/4 cups organic unbleached bread flour
    1 teaspoon yeast

    Put all wet ingredients in the breadmaker pan first, followed by the dry ingredients. Press the dough setting. My breadmaker takes about an hour to do this. After it’s done, I get my dough out and throw it around, the way I see those pizza chefs do it on TV, then I lay it on a buttered baking sheet and flatten it out with a rolling pin.

    Next, preheat oven to 425 degrees Fahrenheit while putting on the toppings.

    Crunchy Pizza Ingredients

    You can get creative with your own, of course. I use organic pasta sauce, shredded cheese, pepperoni (only on half the pizza for my husband, because my daughter and I prefer just cheese).

    Now here’s the ingredient that makes it crunchy. Shoestring Potatoes. The potatoes are cut thicker than how Shakey’s does it, but it does the job. Sprinkle that on top of the pizza.

    Bake for 20 minutes.

    Mangia bene, vivi felice!

  • Granola Recipe

    Granola Recipe

    Warm freshly baked granola is a breakfast treat. Cold not so freshly baked granola is fun snack. You could put it in a mason jar and give it away for Christmas too. Here’s how to make it.

    Granola Ingredients

    Ingredients:
    4 cups old fashioned rolled oats
    1 cup raw wheat germ
    1 cup chopped walnuts
    1/2 cup sunflower seeds
    1/4 cup brown sugar
    1 teaspoon cinnamon
    1/4 teaspoon salt
    1/3 cup organic canola oil
    1/3 cup raw honey
    1/3 cup water

    Granola Mix

    Preheat the oven to 300 degrees Fahrenheit. Combine oats, wheat germ, walnuts, sunflower seeds, brown sugar, cinnamon and salt in a large bowl. Make a well in the middle of the dry ingredients and pour in the canola oil, honey and water. Mix together until well incorporated. Spread evenly on a baking pan.

    Bake the granola for 40 minutes or until lightly browned, stirring every 15 minutes to keep the granola evenly browned and prevent it from sticking to the pan. Let it cool completely after removing from the oven.