Tag: kitchen accessories

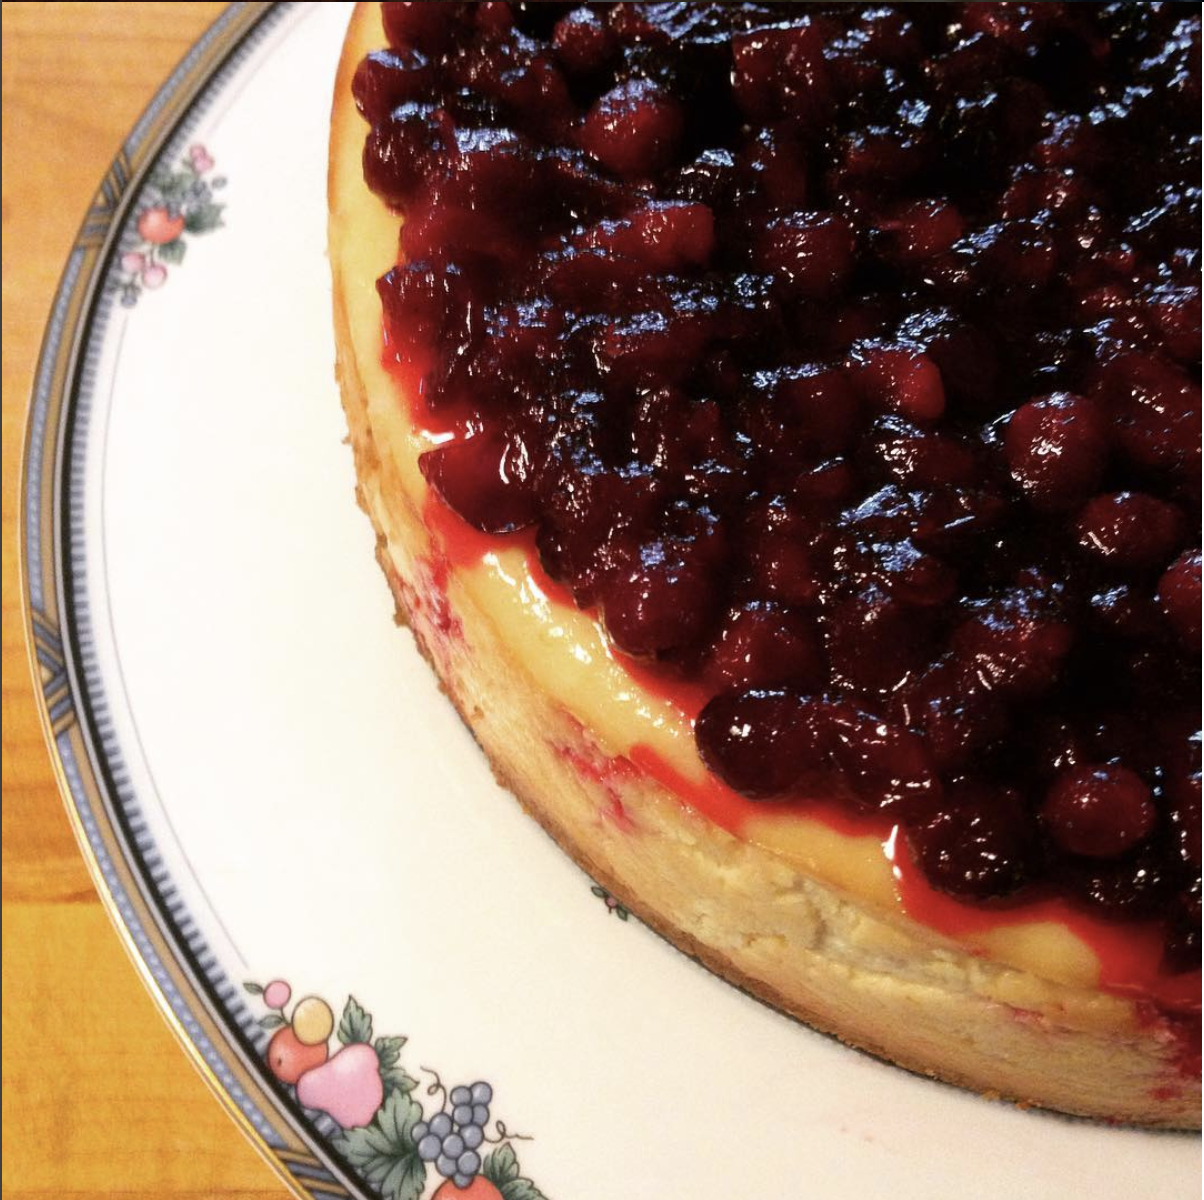
  • Cranberry Cheesecake

    Cranberry Cheesecake

    From the moment I took my first ever bite of a cheesecake, I was hooked for life. For the longest time, though, I always bought it, never made it from scratch here at home. It took a friend coming over and making one right in my kitchen before I realized how easy it is. Back then I didn’t even have a KitchenAid Mixer . It was all made with elbow grease. (The trick is to make sure the cream cheese is completely soft.)

    Now that my dear husband bought me one, it’s even easier. Faster. Well, at least the prep is. So tempt your family with this cheesecake recipe if you want them to get you a KitchenAid Mixer for Christmas. It will be worth it, I promise.

    Cranberry Cheesecake

    Ingredients for Cheesecake:
    (Get certified organic ingredients when possible.)
    15 graham crackers, ground
    3 tablespoons butter, melted
    4 packages cream cheese (8 oz each)
    1 1/2 cups sugar
    3/4 cup almond milk
    4 eggs
    1 cup sour cream
    1 tablespoon vanilla
    1/4 cup all-purpose flour

    Preheat the oven to 350 degrees Fahrenheit (175 degrees Celsius). Grease a 9 inch springform pan. Thrifty Tip: I save the wax paper from sticks of butter in the freezer. I use it to grease any and all baking pans.

    In a medium bowl, mix graham cracker crumbs with melted butter and press onto the bottom of the springform pan.

    In the KitchenAid Mixer bowl (or a large bowl), mix cream cheese with sugar until smooth. Add almond milk, eggs one at a time, sour cream, vanilla, and flour. Mix until smooth. Pour this cream cheese mix into springform pan, on top of the graham cracker crust.

    Bake for 1 hour. Turn the oven down to 300 degrees Fahrenheit for the next 30 minutes, then to 250 for another 30 minutes. Turn the oven off but let the cheesecake stand in the oven. Do not take the cheesecake out. Keep the oven door closed while it cools, approximately 5 hours. Once the oven and the cheesecake is cooled completely, take the cheesecake out of the oven and chill in the refrigerator.

    For cranberry topping, use my Maple Cranberry Sauce recipe.

    Cheers to you on this holiday season!
  • How to make a Thanksgiving Dinner that will make Hulda Clark proud (and kitchen tips for health)

    How to make a Thanksgiving Dinner that will make Hulda Clark proud (and kitchen tips for health)

    I love Thanksgiving Dinner at home. My family loves to cook! Spending the day together in the kitchen is our kind of holiday.

    While writing down my Thanksgiving Dinner menu the other night, my mind wandered toward a list of what I am thankful for. On top of that list is my family’s health, which led me to think about Hulda Clark.

    Twenty years ago, my father-in-law sent my husband and me a book that changed our lives. It was “The Cure For All Cancers,” by Hulda Clark. Hulda Clark’s book opened my eyes to a whole new paradigm in health. She gave me hope by showing me a better way to live. I have a healthy family because of the lifestyle lessons I learned from her. For that I will forever be thankful.

    bamboo forks and knives

    It makes me wonder what it would be like if we had Hulda Clark over for Thanksgiving Dinner. Would I pass the Hulda Clark test? She’s very strict. Here are a few ideas on how to make a Thanksgiving Dinner that Hulda Clark would be proud of:

    1. Get a certified organic turkey.

    And not only turkey, but as many certified organic ingredients as possible for making Thanksgiving Dinner. Don’t let too many toxic chemicals, antibiotics, and GMOs crash your party.

    2. Use glass or stainless steel cookware.

    Hulda Clark recommended as little contact with metal as possible. For cookware, high quality stainless steel is the exception because it is the least likely to leach into its contents. How do you know if it’s high quality? Put a magnet to it. If the magnet sticks, you’re good to go.

    Instead of a copper or aluminum roasting pan and bakeware, use glass pyrex or stainless steel. Tie up your bird with twine, but don’t use the metal pins. Use stainless steel pots and pans. Use wooden spoons and spatulas for stirring. Use ceramic knives for chopping up vegetables. They’re extremely sharp and require no re-sharpening. Use a stainless steel knife for carving the turkey.

    3. Make everything from scratch.

    Let me share my recipes with you:

    There are millions of other recipes online. Choose the ones that have the least processed ingredients.

    4. Use bamboo forks and knives for place settings.

    As I explained in #2, Hulda Clark recommended as little contact with metal as possible. She lauded Asian cultures that use chopsticks for eating as a model of health.

    Think back to the fall of the Roman Empire due to its misuse of lead in irrigation pipes and goblets. This is the sound alarm that Hulda Clark points to in our civilization’s use of metal amalgams in many things such as cookware, tableware, tooth fillings, and so on.

    Switching to bamboo cutlery makes a giant dent in curbing our daily exposure to metal.

    5. Zappicate food before serving.

    Find pockets of time to zappicate food before serving. Turkey is supposed to rest for 30 minutes after being taken out of the oven. Let that rest time count by setting it on top of the Food Zappicator. (Make sure it’s on its serving platter and not the hot roasting pan to prevent from heat-damaging your North Pole Speaker Box.)

    Do the same for side dishes. Just a little bit of time on the Food Zappicator for some last minute zapping makes the food ready for a healthy meal.

    Do you think Hulda Clark would be proud of my Thanksgiving Dinner? Can you think of any other details I missed?

  • Autumn Apple Pie

    Autumn Apple Pie

    This is a basic apple pie recipe that your grandmother likely already has in her recipe box, but here you go. Now you can have this apple pie recipe online as well.

    Apple Pie

    Ingredients: Perfect Pie Crust
    3 cups pastry flour
    1 cup (2 sticks) butter, softened
    pinch of salt
    1/2 cup iced water

    This is my perfect pie crust. I learned how to do it from a vintage recipe when I got married in 1996 and have perfected it all these years. Mix flour, butter and salt, until mixture is in crumbs. Toss with iced water. Do not overmix. Divide pie crust dough into two. Use the wax paper from one of the sticks of butter to grease the pie pan. Roll out one part of the dough and lay in the pie pan. Roll out the second part of the dough and cut out holes to let the steam out.

    Ingredients: Apple Pie Filling
    7 organic apples, peeled and sliced thin
    1/2 cup organic cane sugar
    1/2 cup organic brown sugar
    3 tablespoons organic and unbleached all-purpose flour
    1 teaspoons organic ground cinnamon
    1/4 teaspoon organic ground ginger
    1/4 teaspoon organic ground nutmeg

    Preheat oven at 375 degrees Fahrenheit. Mix all apple pie filling ingredients in a large bowl. Pour into the pie crust bottom already in the pie pan. Cover with the top pie crust. Pinch together and push a non-metal fork’s tines on the edge of the crust. This is a good time to put the assembled apple pie on the Food Zappicator and turn the zapper on to zappicate the pie. Brush whisked organic egg white on the top crust while zappicating. The egg white wash will give the pie a nice golden color once baked in the oven. Bake for 25 minutes. Turn the pie in the oven and bake for another 25 minutes. Cool before serving.

  • Chicken Kitchen

    Chicken Kitchen

    We just recently moved to an old ranch-style farmhouse on a 3.6 acre property. There’s a lot to do, and many springtime dreams of starting a garden, raising chickens and a beehive. Upon move-in, though, my first priority was to clean and set up the kitchen.

    Let me show you our kitchen, the Chicken Kitchen.

    Chicken Kitchen Before

    The Chicken Kitchen is a charming old farm kitchen, with lots of chicken accents all over. We’ve got the chicken runner under the ceiling, the chicken tiles and the chicken cabinet knobs. Not in the picture are chicken light switches, chicken chain pulls on the ceiling fan, and a chicken sink drain strainer. Chick chick chicken!

    There was a layer of greasy dust everywhere, from the tops of the ceiling runner, the cabinet knobs, drawers and shelves. Don’t even get me started on the stove.

    Chicken Kitchen Drawer Before

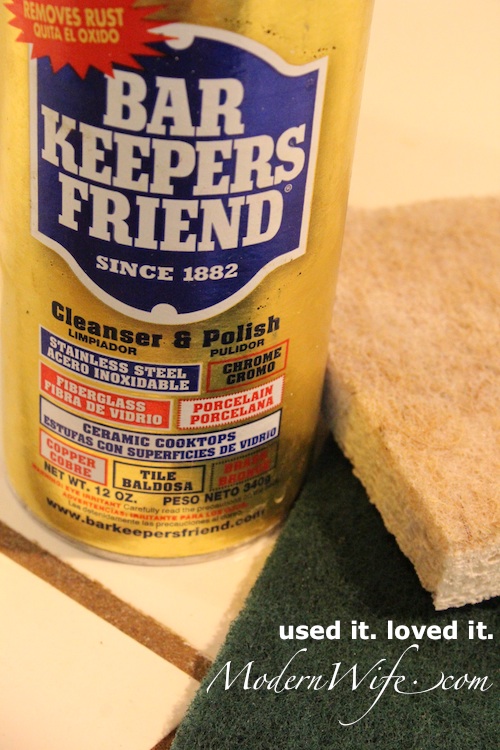
    So I pulled on the rubber gloves and set to work. First I threw away all toxic chemical cleaners and bleaches. I only used water, heavy duty scouring pads, scrub sponge and for really greasy hard-to-scrub areas, Barkeepers Friend.

    Barkeeper's Friend

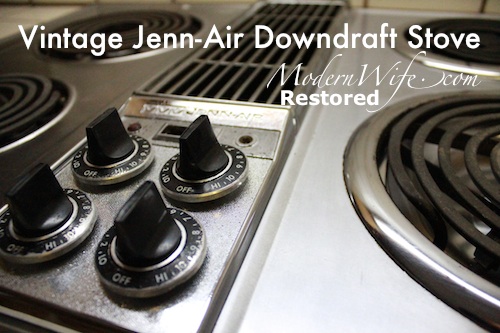
    This vintage Jenn-Air Downdraft Stove was so caked with burnt grease on the stove rings. The burner plates were black and ready to crumble into dust. The downdraft filter was gross, and I fished out a fork, an old spaghetti, and old food caked at the bottom. (Sorry if I’m making you lose your lunch. I skipped taking a picture because I didn’t want to lose my lunch.) The grill and griddle cartridge set was so caked with grease I deemed it beyond restoration, so it went to the trash. (I spied a used set on eBay for less than $50 plus shipping, so maybe, maybe after Christmas…) But the burners were fine. With a lot of elbow grease and new burner plates, this stove is back in business. Look at that polished chrome!

    Vintage Jenn-Air Downdraft Stove

    I scrubbed the greasy dust off the ceiling, runner and molding. No grease or dust was safe from me. Everything got the rub down.

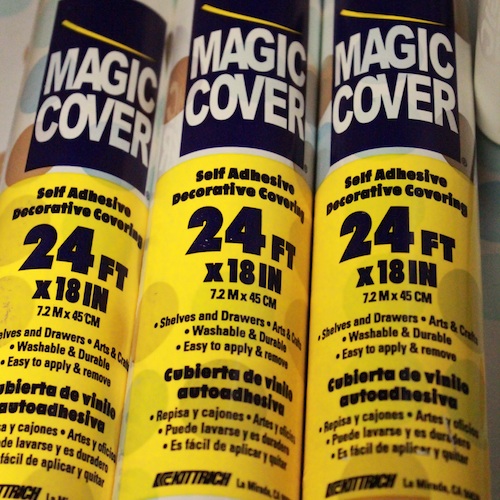
    When all was scrubbed and clean, I bought about 5 rolls of Magic Cover Self-Adhesive Shelf Liners in Polka Dots for the drawers and shelves. They’re over $7 per roll, and they really perk up my kitchen.

    Magic Cover

    I measure my surface and cut the contact paper to size. If it’s a small piece, I peel all the backlining paper off. If it’s a large piece I peel off just a corner or a side. I put the contact paper into position and press down, peeling off the backlining paper as I press the contact paper down, smoothing out bubbles and wrinkles as I go.

    Chicken Kitchen Lining the Drawer and Shelves

    Some of my shelves and drawers are unfinished wood, a little splintery, so I cut out extra on the sides so I can fold it over and cover the edges as well.

    Chicken Kitchen Drawer

    We removed the microwave since we don’t use it, covered the hole with contact paper and turned it into my breadmaker cave.

    Chicken Kitchen Breadmaker

    Thanks for visiting the Chicken Kitchen.

    Chicken Kitchen Knobs

  • Blueberry Ice Cream and Sorbet

    Blueberry Ice Cream and Sorbet

    Natural Health Supply

    cuisinart ice cream maker

    There she is! My beautiful red Cuisinart ice cream maker. My mouth is watering just looking at it.

    I made two desserts this weekend: Blueberry Ice Cream and Blueberry Sorbet.

    Ingredients
    Blueberry Sorbet
    1 1/4 cup sugar
    1 cup water
    1 quart blueberries
    4 tbsp fresh lemon juice

    Blueberry Ice Cream
    1 pint blueberries
    3 tbsp fresh lemon juice
    1 cup sugar, divided
    1 cup whole milk
    2 cups heavy cream
    1 tsp vanilla extract

    Follow manufacturer’s instructions on how to prepare your ice cream maker. If making these two desserts one after another, begin with Blueberry Sorbet, to keep the sorbet dairy-free.

    blueberry macerating in lemon juice

    Blueberry Sorbet

    1. Boil sugar and water in a medium saucepan. Reduce heat and simmer without stirring until sugar is completely dissolved. Transfer to a bowl and cool completely.
    2. Macerate the blueberries with lemon juice.
    3. Add blueberry mixture to the sugar/water bowl and let it chill for an hour.
    4. Churn the mixture in an ice cream maker for at least 30 minutes or until thickened into a soft-serve consistency.
    5. Freeze for at least 2 hours if a firmer sorbet is desired.

    Blueberry Ice Cream

    1. Macerate the blueberries with lemon juice and 1/3 cup sugar. Let it sit for 2 hours.
    2. In a medium bowl, whisk together milk and remaining sugar until the sugar is dissolved. Stir in heavy cream and vanilla.
    3. Churn the mixture in an ice cream maker for at least 30 minutes or until thickened into a soft serve consistency.
    4. Add the blueberry mixture during the last 5 minutes of churning.
    5. Freeze for at least 2 hours if a firmer consistency is desired.

    blueberry sorbet used as topping for bread

    My husband wanted to eat his sorbet before it was frozen so he used it as a topping on a slice of my fresh baked bread. It was kind of weird to me, a bit heartier than I like my desserts, but he liked it, so what the hey! I’m happy if he’s happy! 😀

  • Kitchen Tools and Appliances

    Kitchen Tools and Appliances

    The Steamer

    In my kitchen, the steamer is the appliance I use the most. I can steam a sweet potato, cut in two, two corn cobs and on the second level, chopped broccoli and carrots. Steam brings all the flavor out in these foods and doesn’t drain the vegetables of their nutrition value the way boiling or frying does. The best part of it all is that it is so easy. I chop up vegetables, set up the steamer and turn the timer on. I go off to play the piano or work on the computer for about twenty minutes, until the timer rings to let me know that dinner is ready.

    I have the Oster Model 4714, with helpful recipes contained in the manual. My father gave us our first Oster steamer as a wedding gift. After 7 years, it finally had to be retired. Luckily, my husband found the exact same brand and model on ebay.

    The Food Zappicator

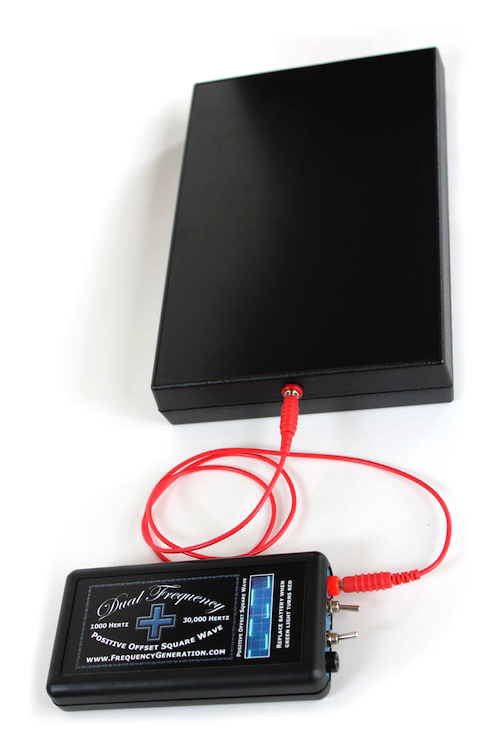
    food zappicatorThe latest addition to our kitchen appliances is the food zappicator. It is an invention by Dr. Hulda Clark, designed to destroy micro-organisms and solvents in food and water through 1,000 Hz of frequency sent through a North Pole Speaker Box. I incorporate zappicating into my food preparation by putting foods or water (in a glass or plastic container – NO METAL) on top of the North Pole Speaker Box anytime the recipe calls for “setting aside.” After the food is prepared, I also give each dish a final zap before serving. Although I am not too strict with the amount of time I zappicate food and water (I usually zap longer than necessary), I generally adhere to the following: meats and dairy for at least 10 minutes; water, fruits and vegetables for at least 7 minutes.

    Stainless Steel Cookware

    As for cookware, we use either glass pots or stainless steel. The way to tell if your stainless steel pot or pan really IS stainless steel, is by putting a magnet on it. If the magnet sticks, then you’ve got quality stainless steel cookware. If the magnet does not stick, then your cookware is a combination of aluminum, nickel and other metals that erode into your food.

    end grain chopping blockEnd Grain Chopping Block

    Recently we bought a new chopping block. It is the best chopping block I have ever owned. What makes this chopping block special is that it is made of end grain wood. It is stronger, more durable against the chopping motion and does not harbor bacteria as much as chopping boards made of plastic. End grain wooden boards also keep knives sharper than side-grain wood, or wood cut with the grain. You can see that this chopping block is made up of small rectangles, instead of the typical full block with wood grain lines lengthwise. You won’t find knife marks on this kind of chopping board, and you’ll likely be able to pass this on to your grandchildren.

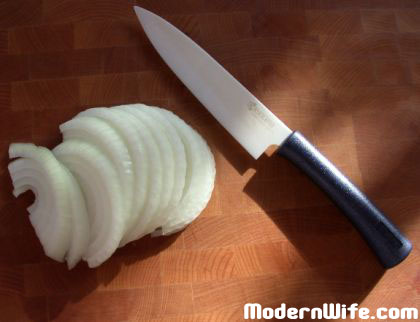
  • Kyocera Ceramic Knife

    Kyocera Ceramic Knife

    Following the lifestyle recommendations of Dr. Hulda Clark included setting up a metal-free kitchen. (Dr. Clark would later revise her findings to allow stainless steel cookware.) We bought a few plastic knives but none could take the place of a real sharpened metal knife. That is, until we found the Kyocera Ceramic Knife.

    The Kyocera Ceramic Knife is so sharp, I regarded it with fear when we first got it in the mail. It chops and slices millimeter-fine, and there is no need for re-sharpening. It is, without a doubt, the sharpest knife in the house. The blade bites right into food, and this prevents any slipping that can happen with a dull knife.

    kyocera ceramic knifeBecause it’s ceramic, I definitely have to be more careful of breaking or chipping it. Unlike metal it does not bend. The blade is made of zirconium oxide, which is second in hardness only to diamonds. It is especially excellent for cutting fruit and vegetables that would otherwise brown if sliced with a metal knife.
    Cleaning the Kyocera Ceramic Knife is easy. I just wash it quickly under the faucet, wipe it in a towel and put it away in a drawer out of reach of my child. I never put my it in the dishwasher. My husband has gone the extra mile and created a thick cardboard holder for our Kyocera Ceramic Knife as an added layer of protection from accidental cutting.

  • Plastic Containers Recycling Codes

    Plastic Containers Recycling Codes

    Paula wrote: I’ve noticed the numbers inside the recycle symbols under plastic containers. What do these numbers mean?

    Hello, Paula. The plastic industry created these symbols for identifying the different types of material plastic is made of. It helps recycling plants sort the plastic containers, and is now a way for consumers to know what their containers are made of. Check the bottoms of the plastic containers you purchase and see if you can identify one of these:

    1 stands for PET or polyethylene terephthalate
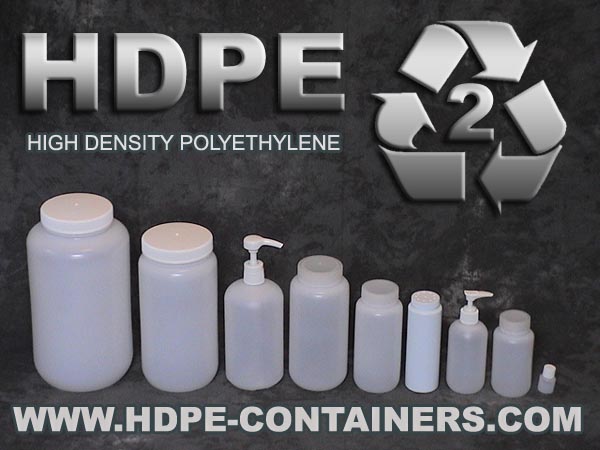
    2 stands for HDPE or high density polyethylene
    3 stands for PVC or polyvinyl chloride
    4 stands for LDPE or low density polyethylene
    5 stands for PP or polypropylene
    6 stands for PS or polystyrene
    7 stands for Other, which means it’s either none of the above or an
    amalgamation of more than one of the above

    In Dr. Hulda Clark‘s latest book, “The Prevention of All Cancers,” she wrote about HDPE Plastic being the best kind for food and beverage storage because it is the most dense out of all plastic materials. This means that the chemicals making up the plastic does not leak into the beverage or food that it contains.

    Ever notice that plastic taste you get when drinking water out of a clear plastic bottle? Your taste buds are telling you that your water contains more than just H2O, it also has traces of the chemicals leaking from the clear plastic container you are drinking out of.

    Because of its density, HDPE Plastic is used to make milk containers, bottles for nutritional supplements, and basically anything that needs to be protected from any chemical leakage. As consumers become more savvy about the products that they buy, there has become a demand for HDPE food and beverage containers for the home. There are now a variety of HDPE bottles and containers that can be bought for household use. We found a few of these and made them available in our shop at HDPE-Containers.com.