Tag: meal

  • Chicken Tikka Masala Indian Meal

    Chicken Tikka Masala Indian Meal

    My husband introduced me to Indian food when we first started dating. It was love at first bite. I believe my first was The Clay Oven in Portland, Maine, soon followed by forays into Indian Row in New York City. When we moved to California, we went to Kulbir’s India Palace in Alameda faithfully for over a decade.

    I remember being a new mom, apprehensive because it had been three days and I still didn’t have any breastmilk. My daughter was under a bilirubin light in Children’s Hospital in Oakland. My husband and my parents managed to convince me to take a break and go out to eat. I had a bit of raita and it was like a dam broke. My milk had arrived! From then on, I became a believer in the medicinal power of raita.

    Raita

    Combine 1 cup of whole milk organic plain raw yogurt, 1/2 cup shredded cucumber, 1/2 cup shredded carrots, 2 tablespoons chopped mint or cilantro, and 1 tablespoon freshly squeezed lemon juice. Season with cumin, salt, and pepper. Refrigerate until ready to eat. I usually do this before anything else. The longer it chills, the more the flavors come together.

    The entree in this Indian meal is a Western favorite: Chicken Tikka Masala on basmati rice. On the side, we have naan, raita, tamarind chutney, and sweet mango chutney.

    We are lucky to have naan in our grocery store. If you don’t, there are easy recipes online for making it from scratch. Last resort, you could always get it at Amazon. Also in our grocery store ethnic aisle are tamarind chutney and sweet mango chutney. They also have hot mango chutney, but the sweet mango chutney has enough spice to make me happy. The tamarind chutney comes in a concentrated paste that needs to be diluted and sugared to taste.

    I start the Chicken Tikka Masala in a crockpot early in the day. Believe me it’s worth it.

    Chicken Tikka Masala

    Ingredients:
    1 pound organic chicken tenders
    15 oz organic tomato sauce
    1 medium onion, minced
    1 tablespoon fresh ginger, minced
    3 garlic cloves, minced
    1 1/2 teaspoon garam masala
    1 teaspoon ground turmeric
    Pinch cayenne pepper
    Salt and pepper
    1 cup whole milk organic plain raw yogurt
    Green onions or cilantro for garnish

    Combine all ingredients except yogurt in a crockpot. Set on high for 4 hours or low for 8 hours. Ladle a cup of sauce from the crockpot into a medium bowl. Whisk the yogurt into the sauce until smooth. Stir back into the crockpot. Salt and pepper to taste. Serve on a bed of basmati rice and topped with cilantro or green onions.

    Basmati Rice

    Before I add yogurt to the Chicken Tikka Masala pot, I get started on the Basmati Rice to make sure everything is served warm altogether. Melt 1 tablespoon unsalted butter or ghee in a medium saucepan over medium heat. Add 1 1/2 cups basmati rice and stir it about until rice is translucent and slightly toasty, about 5 minutes. Stir in 2 1/4 cups water, 1 teaspoon salt, 1 cinnamon stick, and a bay leaf. Bring to a simmer. Reduce heart to low and cover for about 14 minutes until liquid has been absorbed and rice is tender. Fluff rice with a fork.

    And serve.
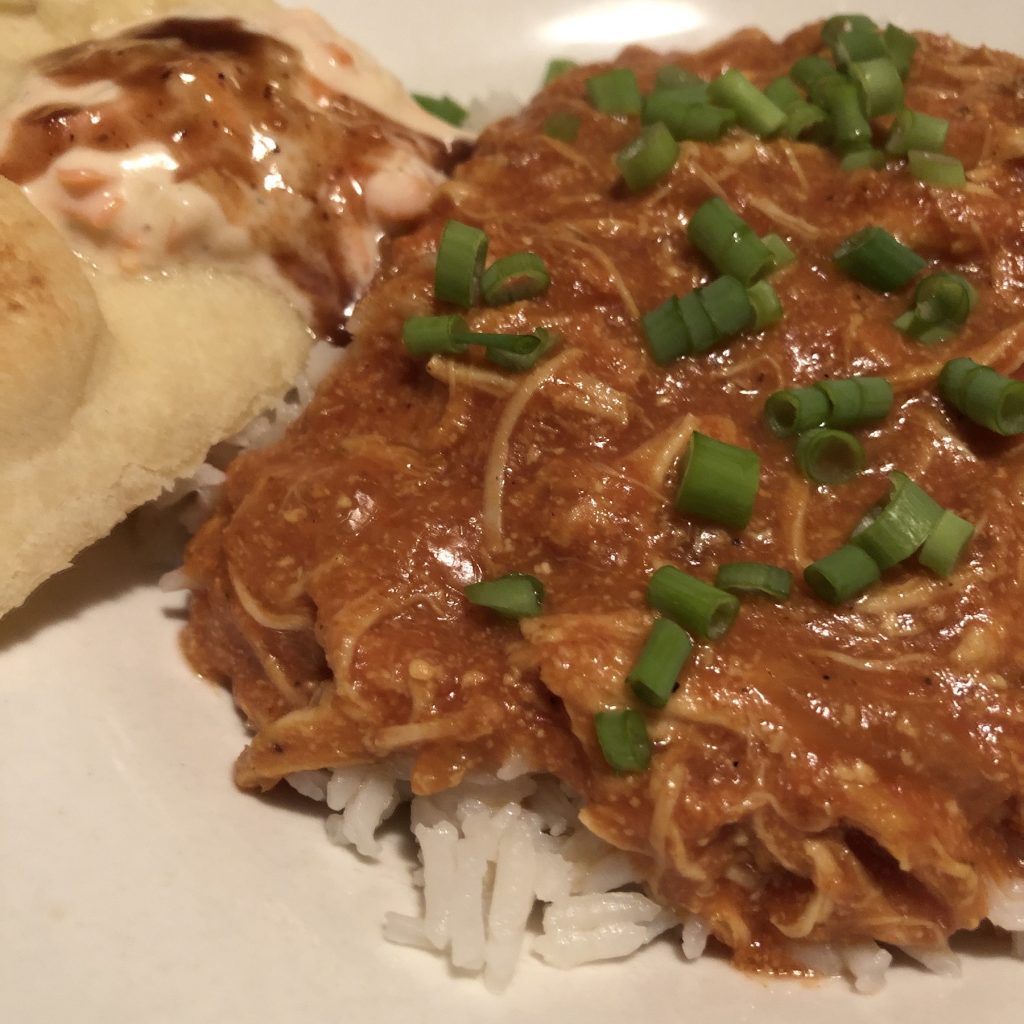
    Chicken Tikka Masala on basmati rice with side of naan, raita, tamarind chutney, and mango chutney

  • How to make a Thanksgiving Dinner that will make Hulda Clark proud (and kitchen tips for health)

    How to make a Thanksgiving Dinner that will make Hulda Clark proud (and kitchen tips for health)

    I love Thanksgiving Dinner at home. My family loves to cook! Spending the day together in the kitchen is our kind of holiday.

    While writing down my Thanksgiving Dinner menu the other night, my mind wandered toward a list of what I am thankful for. On top of that list is my family’s health, which led me to think about Hulda Clark.

    Twenty years ago, my father-in-law sent my husband and me a book that changed our lives. It was “The Cure For All Cancers,” by Hulda Clark. Hulda Clark’s book opened my eyes to a whole new paradigm in health. She gave me hope by showing me a better way to live. I have a healthy family because of the lifestyle lessons I learned from her. For that I will forever be thankful.

    bamboo forks and knives

    It makes me wonder what it would be like if we had Hulda Clark over for Thanksgiving Dinner. Would I pass the Hulda Clark test? She’s very strict. Here are a few ideas on how to make a Thanksgiving Dinner that Hulda Clark would be proud of:

    1. Get a certified organic turkey.

    And not only turkey, but as many certified organic ingredients as possible for making Thanksgiving Dinner. Don’t let too many toxic chemicals, antibiotics, and GMOs crash your party.

    2. Use glass or stainless steel cookware.

    Hulda Clark recommended as little contact with metal as possible. For cookware, high quality stainless steel is the exception because it is the least likely to leach into its contents. How do you know if it’s high quality? Put a magnet to it. If the magnet sticks, you’re good to go.

    Instead of a copper or aluminum roasting pan and bakeware, use glass pyrex or stainless steel. Tie up your bird with twine, but don’t use the metal pins. Use stainless steel pots and pans. Use wooden spoons and spatulas for stirring. Use ceramic knives for chopping up vegetables. They’re extremely sharp and require no re-sharpening. Use a stainless steel knife for carving the turkey.

    3. Make everything from scratch.

    Let me share my recipes with you:

    There are millions of other recipes online. Choose the ones that have the least processed ingredients.

    4. Use bamboo forks and knives for place settings.

    As I explained in #2, Hulda Clark recommended as little contact with metal as possible. She lauded Asian cultures that use chopsticks for eating as a model of health.

    Think back to the fall of the Roman Empire due to its misuse of lead in irrigation pipes and goblets. This is the sound alarm that Hulda Clark points to in our civilization’s use of metal amalgams in many things such as cookware, tableware, tooth fillings, and so on.

    Switching to bamboo cutlery makes a giant dent in curbing our daily exposure to metal.

    5. Zappicate food before serving.

    Find pockets of time to zappicate food before serving. Turkey is supposed to rest for 30 minutes after being taken out of the oven. Let that rest time count by setting it on top of the Food Zappicator. (Make sure it’s on its serving platter and not the hot roasting pan to prevent from heat-damaging your North Pole Speaker Box.)

    Do the same for side dishes. Just a little bit of time on the Food Zappicator for some last minute zapping makes the food ready for a healthy meal.

    Do you think Hulda Clark would be proud of my Thanksgiving Dinner? Can you think of any other details I missed?

  • Quail Eggs

    Quail Eggs

    Aren’t quail eggs cute? Five of these quail eggs would have the caloric equivalent of one large chicken egg. They’re rich in vitamin A, choline, selenium, and iron. (Source)

    You may encounter raw quail eggs on top of tobiko in fine sushi restaurants. It makes my mouth water just typing those words up.

    I bought mine at my local farmers market. At home, I hardboil them for 3 minutes, peel, and serve with soup. Here’s a quick recipe that is done in minutes. You’ll spend more time peeling those quail eggs than cooking this meal. Ya!

    Noodles with Quail Eggs

    Miso Noodles with Quail Eggs

    Ingredients:
    1 tablespoon dulse
    2 tablespoons miso
    3 cups water
    6 oz. soba noodles
    1 nardello sweet pepper, chopped
    hardboiled quail eggs
    green onion

    Bring water to boil on high heat. Add dulse and miso. Once boiling, add noodles. Cook for 4 minutes. Toss in sweet pepper and quail eggs at the last minute. Serve with green onion garnish. Serves 3.

    Lunchtime!

  • Pigs in a blanket

    Pigs in a blanket

    This little piggy went to the party. This little piggy went to school. This little piggy was an afternoon snack at home. This little piggy went to gymnastics practice. And this little piggy went wee wee wee all the way in my tummy.

    It’s the middle of winter and these piggies are cold! Make them blankets from scratch! Sure, you can buy prepackaged dough that pops out of a cardboard can, but then you’d be setting yourself up for all kinds of chemical additives and subpar ingredients. Besides, making the dough from scratch is easy and fun. My 11 year-old daughter can do it by herself. Kneading it is the best part. She gets all kung fu about it. You can, too.

    Pigs in a blanket recipe

    Ingredients:
    2 cups organic all-purpose flour
    1/2 teaspoon baking powder
    1 tablespoon sugar
    1 teaspoon salt
    1/2 cup organic safflower oil
    1/2 cup hot water
    30 mini beef franks
    1 egg, beaten
    sesame seeds
    flax seeds

    Preheat oven 375 degrees F. Mix together flour, baking powder, sugar and salt in a medium bowl. Add oil and water. Whisk together until fully incorporated and you see no powdered lumps left. Knead the dough well on a floured surface. Divide the dough in half and roll out the first lump until it’s thin and semi-rectangular. Using a knife or a pizza roller, cut out 15 triangles. Position a mini frank on the wider end of each triangle and roll the dough around the little piggy. Brush with egg and lay on a greased baking sheet. Repeat until there are 30 little piggies in a row. Sprinkle sesame seeds and flax seeds. Bake for 25 minutes or until pastry is golden brown.

  • Aloo Gobi

    Aloo Gobi

    Aloo Gobi is one of those dishes I’ve enjoyed in lunch buffets at Indian Restaurants, but don’t usually order as an entree for dinner. It’s unassuming and understated, not as much star power as the tandooris or the tikka masalas.

    When it comes to home cooking, though, Aloo Gobi wins because I can make it in under an hour. Also, a quick glance down the list of ingredients reveals at least five ingredients that are known to be cancer-fighting immune boosting superfoods.

    Extra Virgin Coconut Oil is blowing up all over the internet with lists upon lists of the many benefits and uses for it, from nutrition to personal care to first aid to household uses.

    Garlic has been shown to lower risks for certain cancers, as well as supports the immune system. We turn to our recipe for Honey Lemon Garlic Tea every time we feel under the weather and need a boost.

    Ginger fights cancer, relieves motion sickness and nausea, aids digestion, promotes healthy circulation, and many more. It is a major ingredient in Hulda Clark’s recipe for Kidney Cleanse.

    Turmeric contains curcumin, which is more effective than many pharmaceuticals against several chronic and debilitating diseases including cancer, and has no side effects.

    Cauliflower and other Cruciferous Vegetables contain sulforaphane, one of the ten best cancer-killing phytonutrients.

    So here it is, my version of Aloo Gobi, the cancer-fighting, immune boosting superfood that can be made under an hour. I started out with this recipe and modified as I went along.

    Aloo Gobi

    Ingredients:
    1 tablespoon extra virgin coconut oil
    1 teaspoon cumin
    1 teaspoon minced garlic
    1 tablespoon minced ginger
    1 onion, sliced
    2 medium diced potatoes
    1 teaspoon turmeric
    1 teaspoon paprika
    1 teaspoon garam masala
    2 tablespoons plain yogurt
    1/2 cup water
    2 tablespoons coconut milk
    1 head of cauliflower
    Salt to taste
    Rice
    Cilantro

    Heat oil in a medium skillet over medium heat. Saute cumin, garlic and ginger until the spices are infused in the oil. Spread onions across the skillet but do not stir. Let the edges of the onion caramelize. Stir in potatoes and cover to steam. Season with turmeric, paprika, and garam masala. Stir in yogurt, water and coconut milk. Cover and let it cook for about ten minutes.

    While the potatoes are cooking, cut up the cauliflower into florets and stir into the stew. Cover and let it simmer for half an hour. Salt to taste. Serve on top of rice and garnish with cilantro.

  • How to Make Homemade Pasta

    How to Make Homemade Pasta

    My daughter has been making homemade pasta with her Dad for as long as she remembers. Preparing meals is a family activity in our home. It’s so gratifying to see my 10-year-old daughter competently handling knives and the stove, while conversing about our family’s health philosophy (in between silly stuff).

    We stopped eating wheat for a few years, but the complexity of blended flours trying to capture the texture and taste of wheat seemed more of a process than simply committing to using organic or non-GMO wheat flour products.

    We still enjoy coconut flour for making coconut muffins, arrowroot flour for making dry arrowroot cookies, rice flour for making rice cakes. But when it comes to making bread and pasta, there is nothing like good old wheat.

    Homemade Pasta

    Ingredients:
    1 cup semolina flour
    1/2 teaspoon salt, optional
    2 eggs or 3 egg whites, free-range and organic

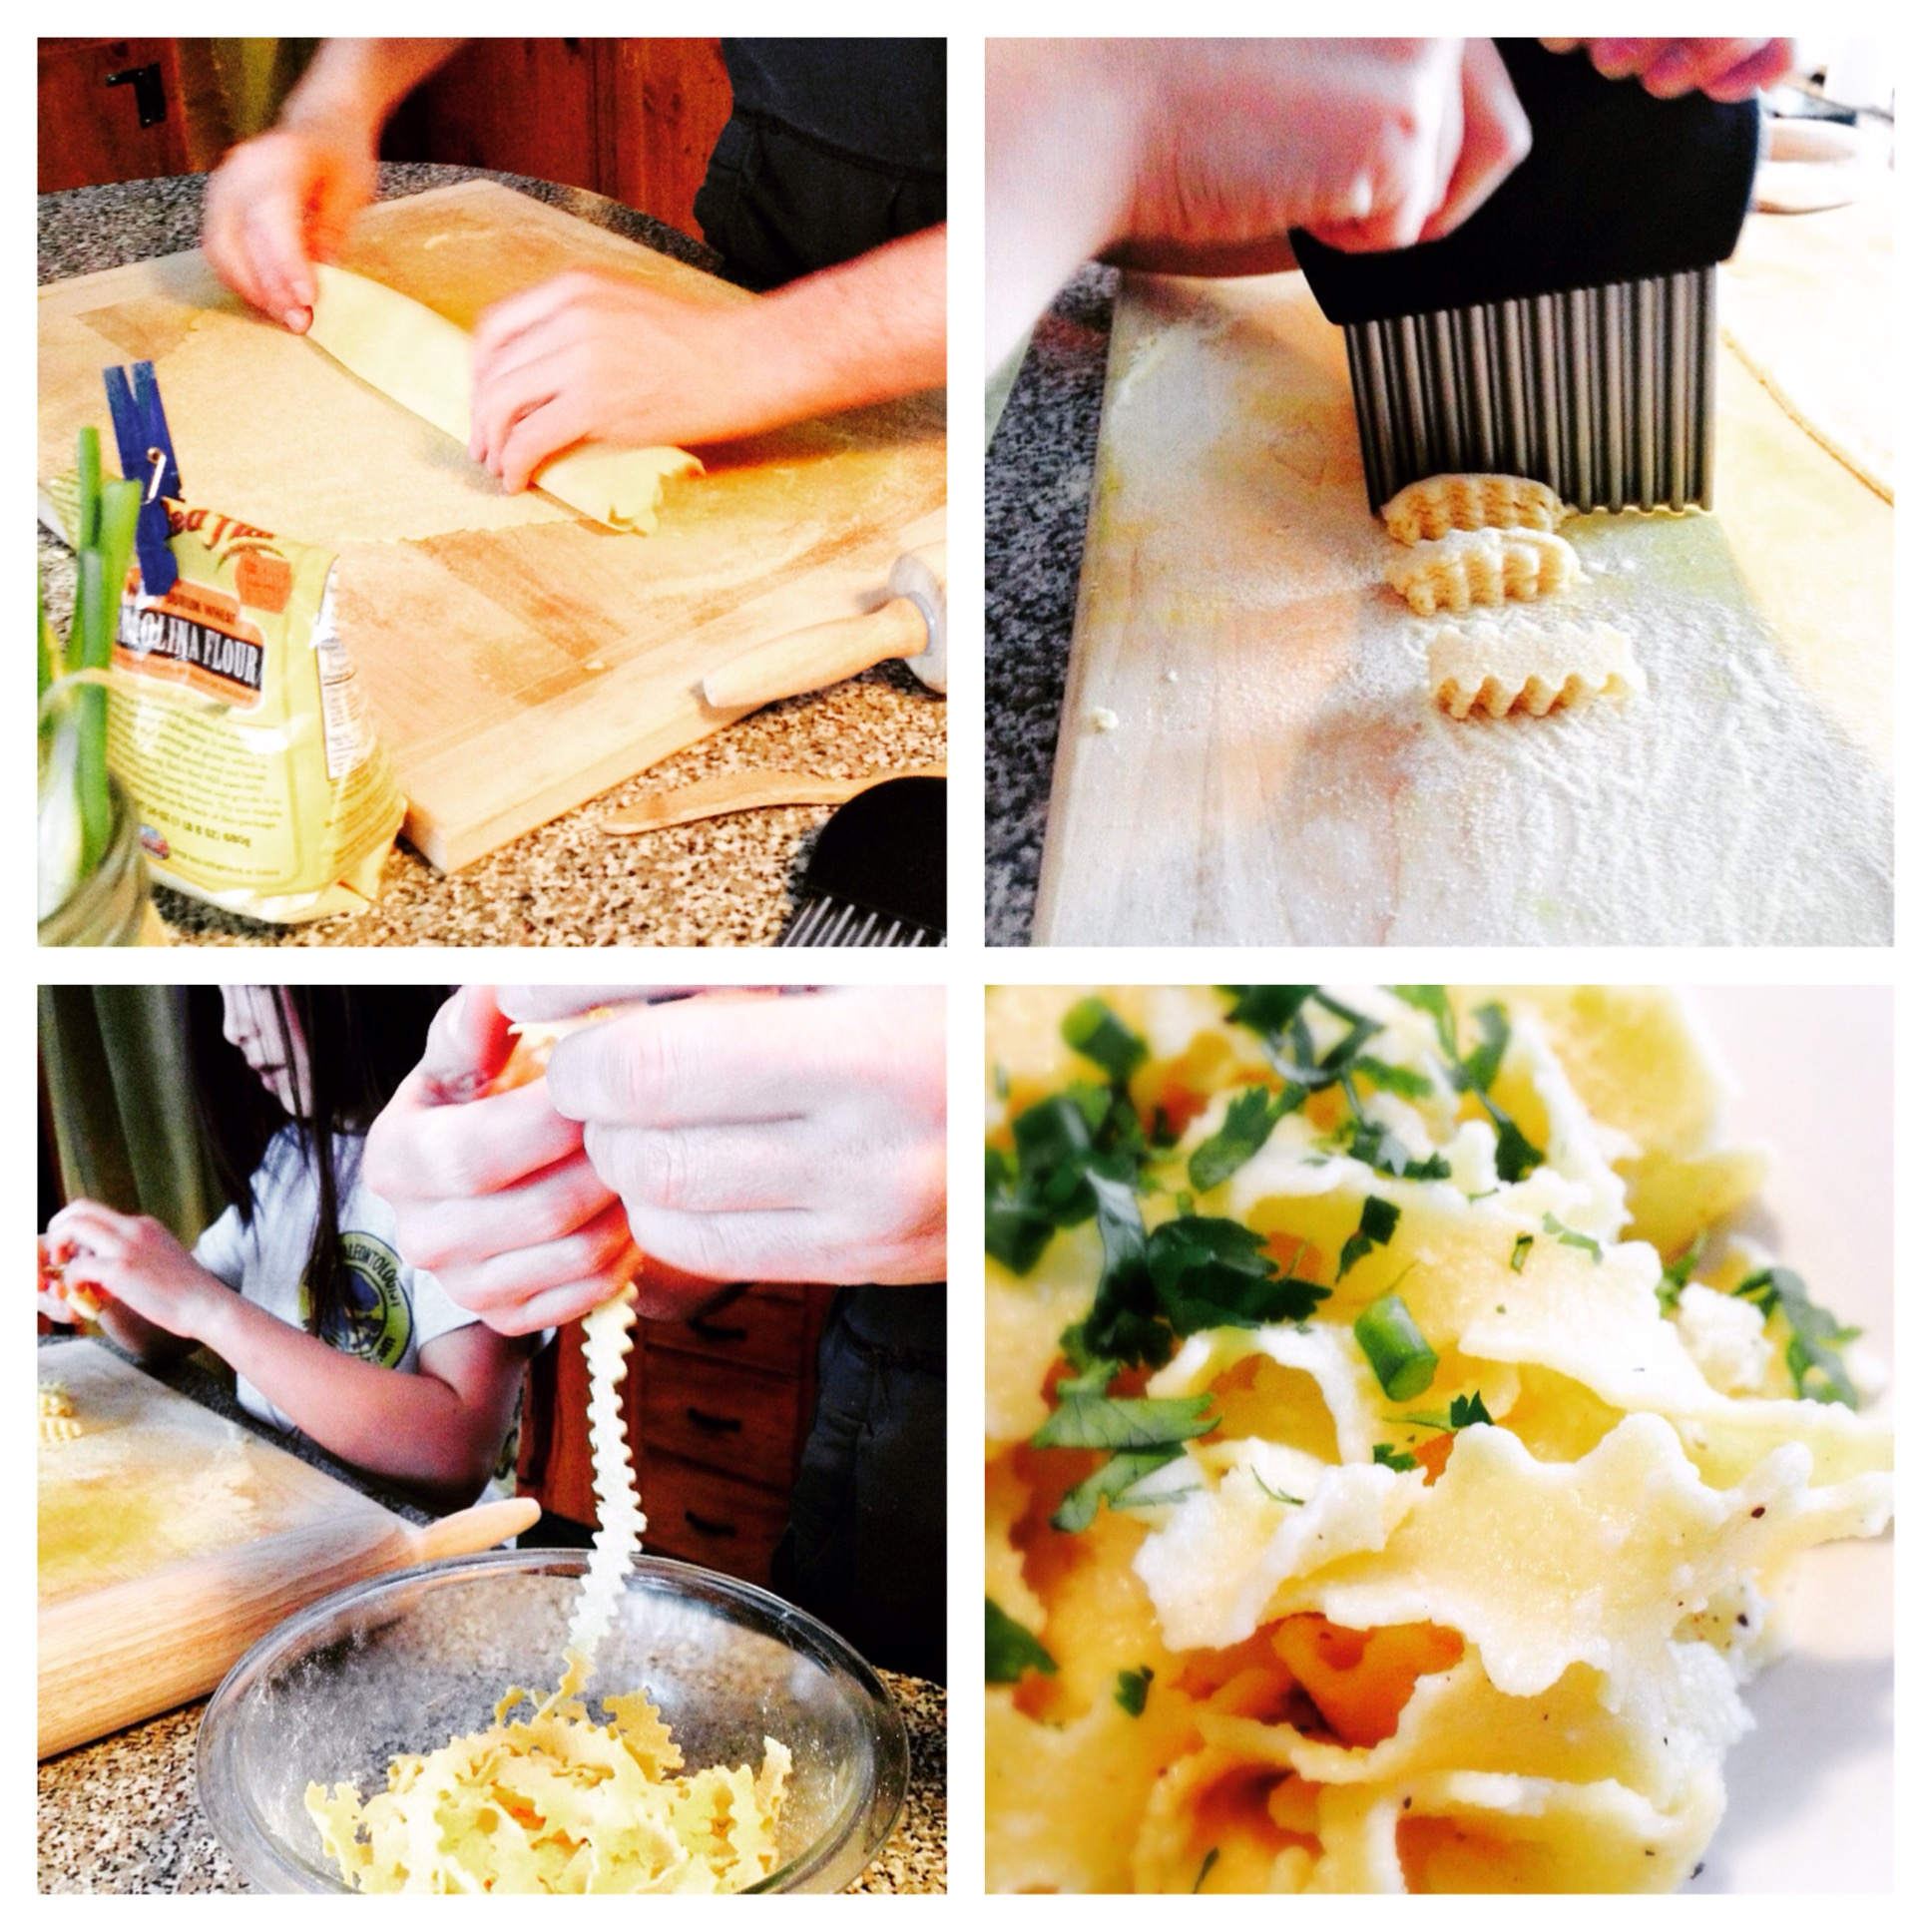
    Combine semolina flour and salt. Add beaten eggs. Mix to make a stiff dough. On a lightly floured surface, flatten dough with a rolling pin. Jelly-roll the flattened dough and cut into noodles.

    Homemade pasta for dinner. #semolina #pasta

    A photo posted by Modern Wife (@modernwife) on

    We used a curly knife to cut the pasta.

    My daughter chops the #pasta with a curly knife.

    A photo posted by Modern Wife (@modernwife) on

    Bring a large pot of water to boil. Unroll the pasta and add to the pot of boiling water. Cook until al dente.

    Unrolling #homemade #pasta.

    A photo posted by Modern Wife (@modernwife) on

    Serve with your favorite sauce. Or simply toss with butter, salt and herbs such as green onions and cilantro.

    #homemade #pasta #dinner with chopped #herbs. #cilantro #greenonions

    A photo posted by Modern Wife (@modernwife) on

    Serves 3.

    Buon appetito!

    Homemade Pasta

  • Sprouts Plus Vietnamese Noodle Bowl Recipe

    Sprouts Plus Vietnamese Noodle Bowl Recipe

    I sprout. Do you sprout?

    I just felt like it one morning. I got out a couple of quart mason jars and put in a tablespoon each of alfalfa and mung beans. Poured it full of water, a teaspoon each of food-grade hydrogen peroxide and let it sit for 15 minutes.

    I trapped a mesh net (I save the mesh net packaging my lemons come in) between the mouth of the jar and the band – see my blog entry on alfalfa sprouts. Pour the water out, fill it back up again and let it soak in water for 8 to 12 hours in a dark place.

    Pour the water out, rinse, pour the water out, let it sit. Repeat everyday. Once the sprouts are a good size they are ready to sit in a sunny place to grow some greens.

    Eat!

    Vietnamese Shrimp Noodle Bowl

    This is my version of the Vietnamese Shrimp Noodle Bowl. The traditional way to do it involves fish sauce which I don’t have, and pickled carrots, which is not well-liked by my family. So here goes.

    Ingredients:
    1 lb shrimp, peeled and deveined
    1 package (8oz) vermicelli (I have the Explore Asian Jasmine Brown Rice Vermicelli)
    1 tablespoon organic virgin coconut oil
    1 tablespoon Bragg’s amino acid (I may skip this next time. It tends to overpower all flavor.)
    1 teaspoon organic coconut palm sugar (I bought this thinking it would be a good sweetener but found out it was harvested using unsustainable practices.)

    From our local organic farmstand:
    leafy greens
    cut carrots
    cut cucumber

    mint from our backyard
    mung bean sprouts grown right in our kitchen

    Directions:
    Heat coconut oil in a large skillet over medium. Add the shrimp and cook until pink. Flavor with Braggs and sugar. Cook until sauce is almost cooked off.

    Boil water in a medium saucepan. Add vermicelli and cook for 5 minutes. Drain and wash with cold water.

    Arrange leafy greens, carrots, cucumber, mint, mung bean sprouts and cooked vermicelli on the plate. Top the vermicelli with shrimp. We skipped the syrupy sauce. The shrimp is plenty flavorful on the noodles.

    This is one way we sprout. How do you sprout?

  • Fiddleheads

    Fiddleheads

    I’ve never met this vegetable before: fiddleheads.

    It’s the curled ends of a young ostrich fern, harvested in early spring. It is rich in vitamin A and vitamin C.

    There are so many recipes and ideas for cooking fiddleheads online, but here is the simplest way to serve it:

    Steam the fiddleheads for about 20 minutes. Melt butter on warm fiddleheads. Salt and pepper to taste. Serve with quinoa on the side.

  • Guacamole & Salsa

    Guacamole & Salsa

    I make the easiest and most delicious Guacamole & Salsa east of the Mission. Or so I think. Give it a try and see if I’m right.

    Guacamole & Salsa, when made fresh with organic ingredients, are a super healthy combination. Avocado has more than two times the potassium found in a banana, and is rich in the B vitamins, folic acid and vitamin E. Tomatoes contain lycopene, a powerful anti-cancer nutrient. Cilantro is excellent for removing toxic metals such as mercury from the body. Red Bell Peppers are rich in antioxidants, vitamins A, B, C and E, and a number of beneficial minerals.

    Guacamole

    Ingredients:
    2 organic avocadoes
    1 organic tomato, chopped
    a bunch of organic cilantro, chopped
    salt and pepper to taste

    Mash the avocadoes with a fork. Add chopped tomato and cilantro. Salt and pepper to taste. Mix together.

    Salsa

    Ingredients:
    2 organic tomatoes, chopped
    1 teaspoon lemon juice
    1/4 cup organic bell peppers, chopped (I used red in this recipe, but any color will do)
    a bunch of organic cilantro, chopped
    salt and pepper to taste

    Mix all ingredients together. Squeeze a little lemon juice.

    Serve either or both Guacamole & Salsa with organic and/or non-GMO chips, such as Garden of Eatin’ Blue Corn chips, as seen in the photo above. Enjoy the fiesta!

  • Green Eggs

    Green Eggs

    I started making green eggs when my daughter was a Dr. Seuss-loving toddler. I started out serving it as a sandwich spread, but now that my family is on a gluten-free diet, I serve it with salad. Let’s start with the recipe.

    Green Eggs

    Ingredients:
    1 organic avocado
    2 organic eggs
    salt and pepper to taste

    Boil eggs. For perfect yellow yolks, put eggs in a saucepan and cover with water. Bring to a rolling boil on high then turn the burner off. Let eggs sit in hot water for 15 minutes. Pour out the hot water and replace with cold water. Let it sit for a few minutes, until eggs are cool enough to touch. Peel.

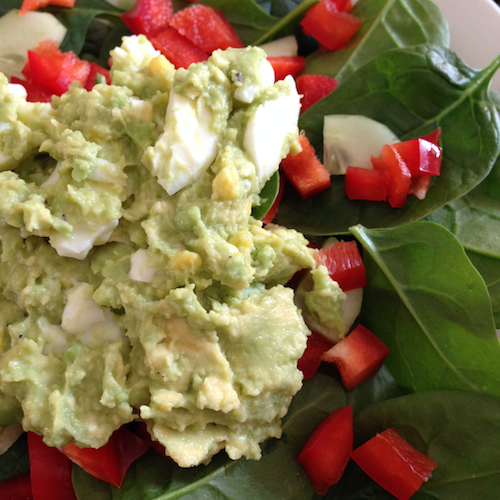
    Mash the avocado, then add eggs cut up roughly with a spoon. Mix together. Salt and pepper to taste.

    Here’s how I serve it nowadays:

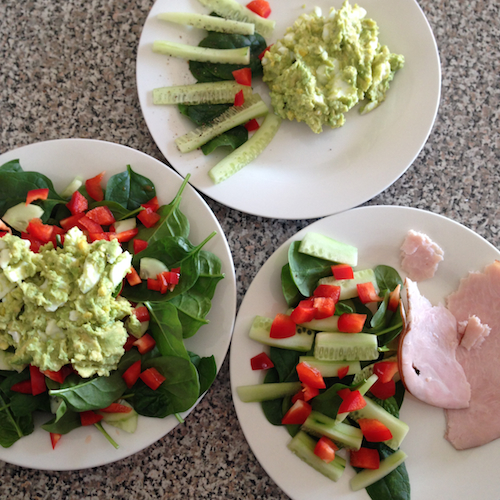
    Green Eggs on salad

    Mine, left, on a heap of green salad – spinach, cucumber, red pepper.

    My daughter’s, top, on the side of 9 spinach leaves (for every year of her age), cucumber slices, and 5 tiny bits of red pepper.

    My husband’s, right, no green eggs. Just a salad and slices of deli turkey. He does not like green eggs and ham. He does not like it, Sam-I-am.